IMAP emails are accessible anywhere, anytime, as long as you have an internet connection and access to your webmail server. It allows you to have a view of your messages whether you are focused on a meeting on your computer, or if you are simply having a quick cup of coffee and on your mobile.
Since IMAP emails are stored on a single server only, one of the downsides is the limited storage that your email host provides.If you would like having a POP set up instead, we can show you how to do that here.
Now, on to IMAP email linking to your Android phone:
- Launch GMail from your applications.
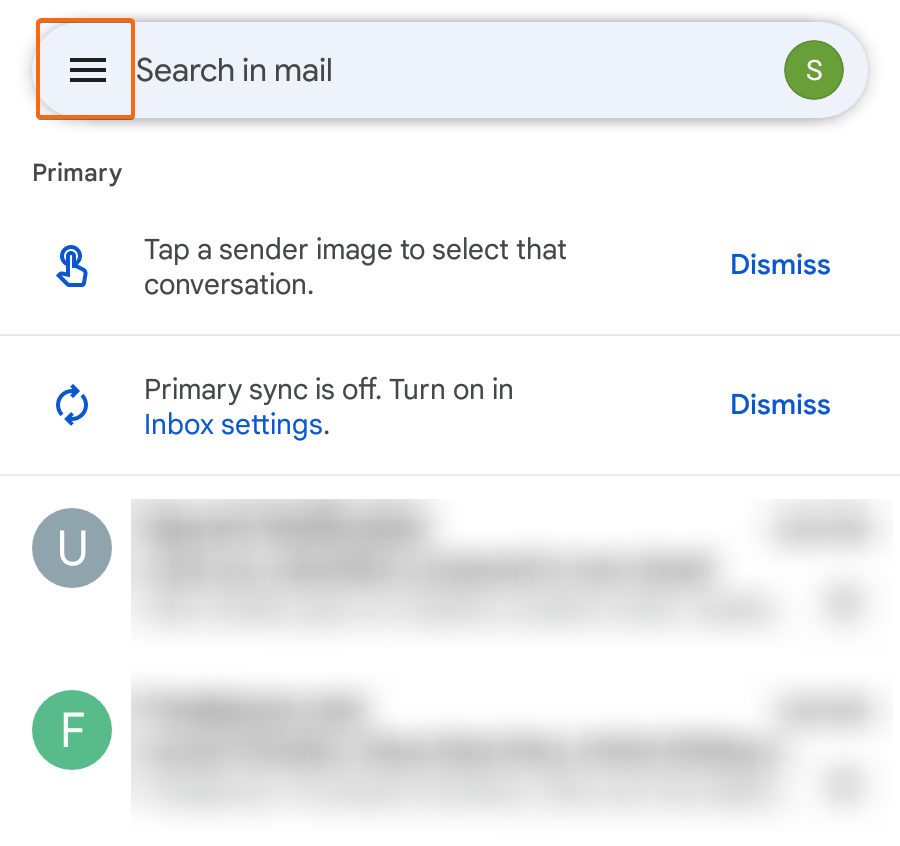
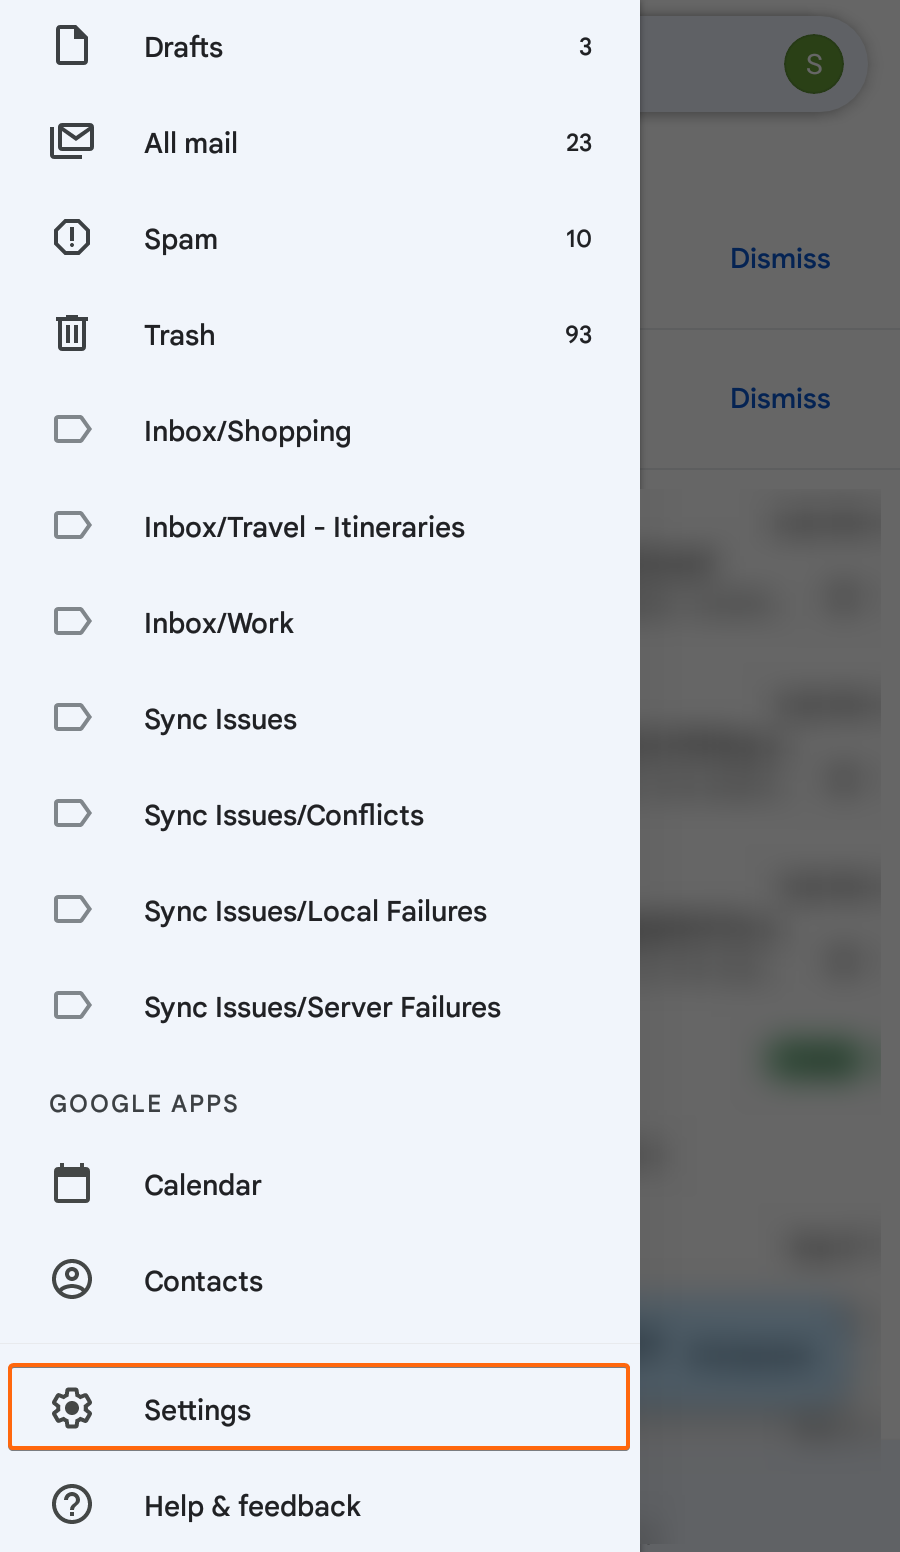
- From your GMail screen, click on the three horizontal lines button at the top left hand side.

Scroll down and find Settings.
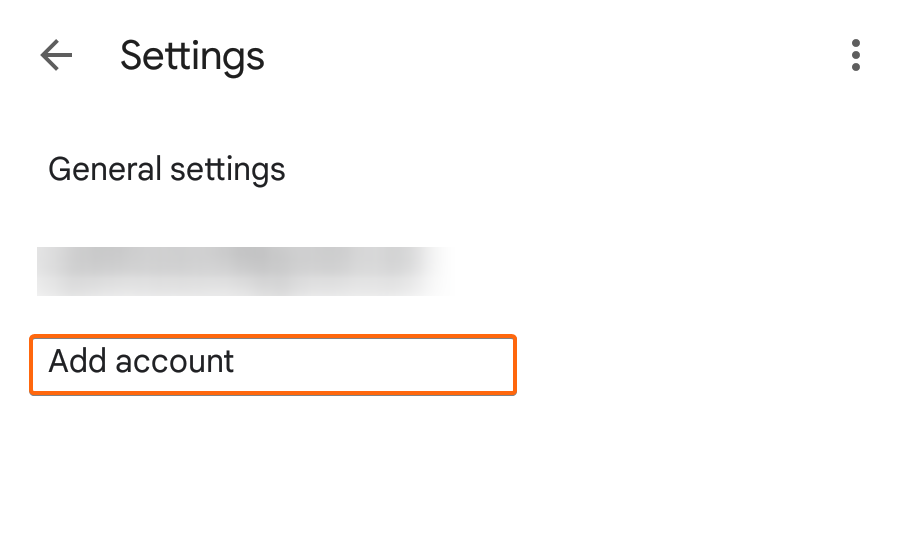
- Click on Add account.

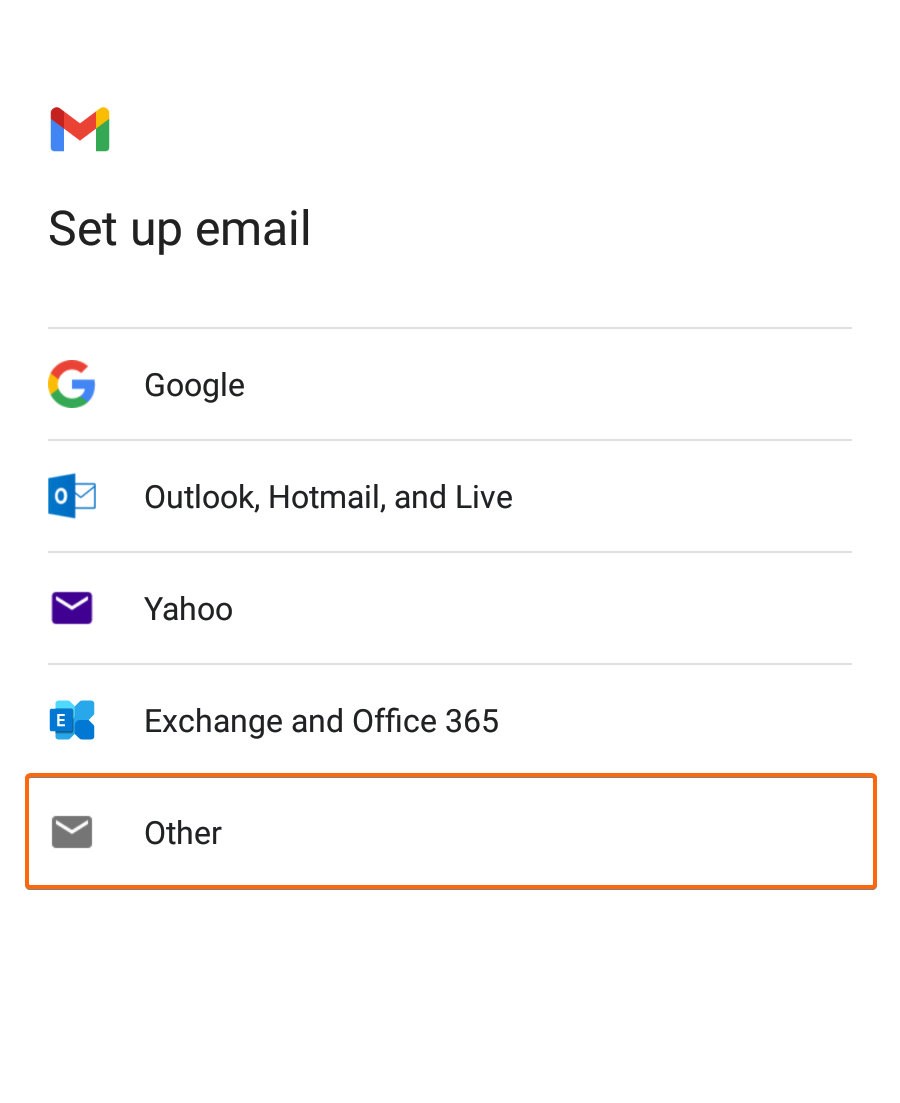
Next, click on Other.
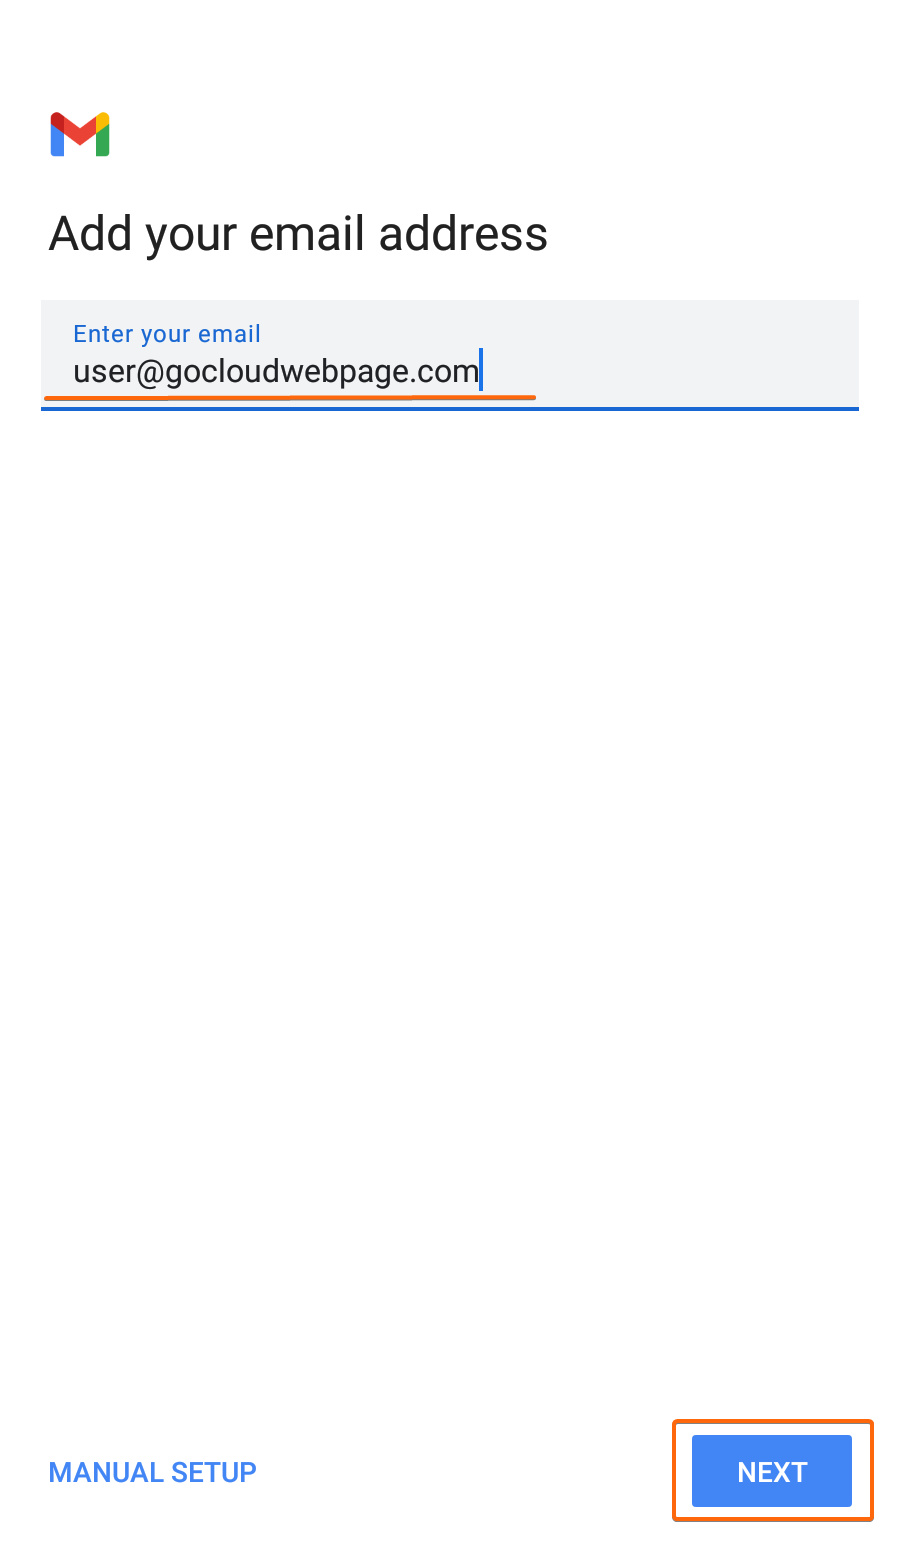
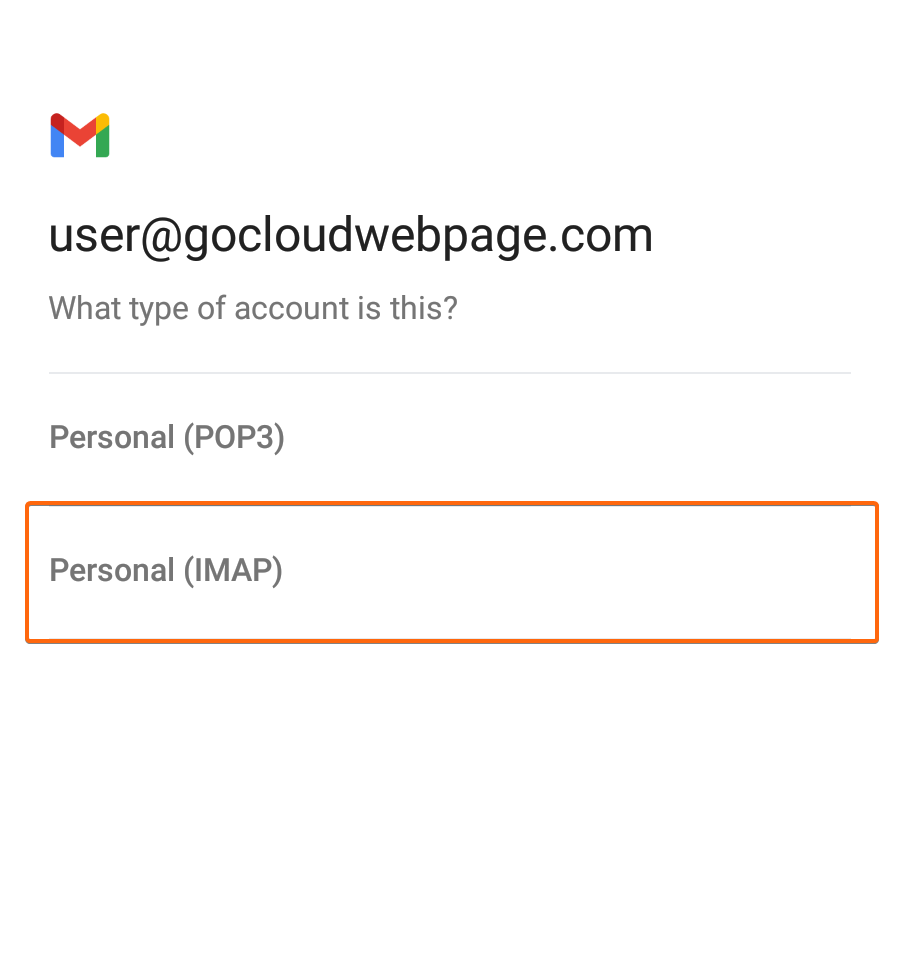
- Enter your IMAP email address on this screen, then click Next.

- Choose IMAP.

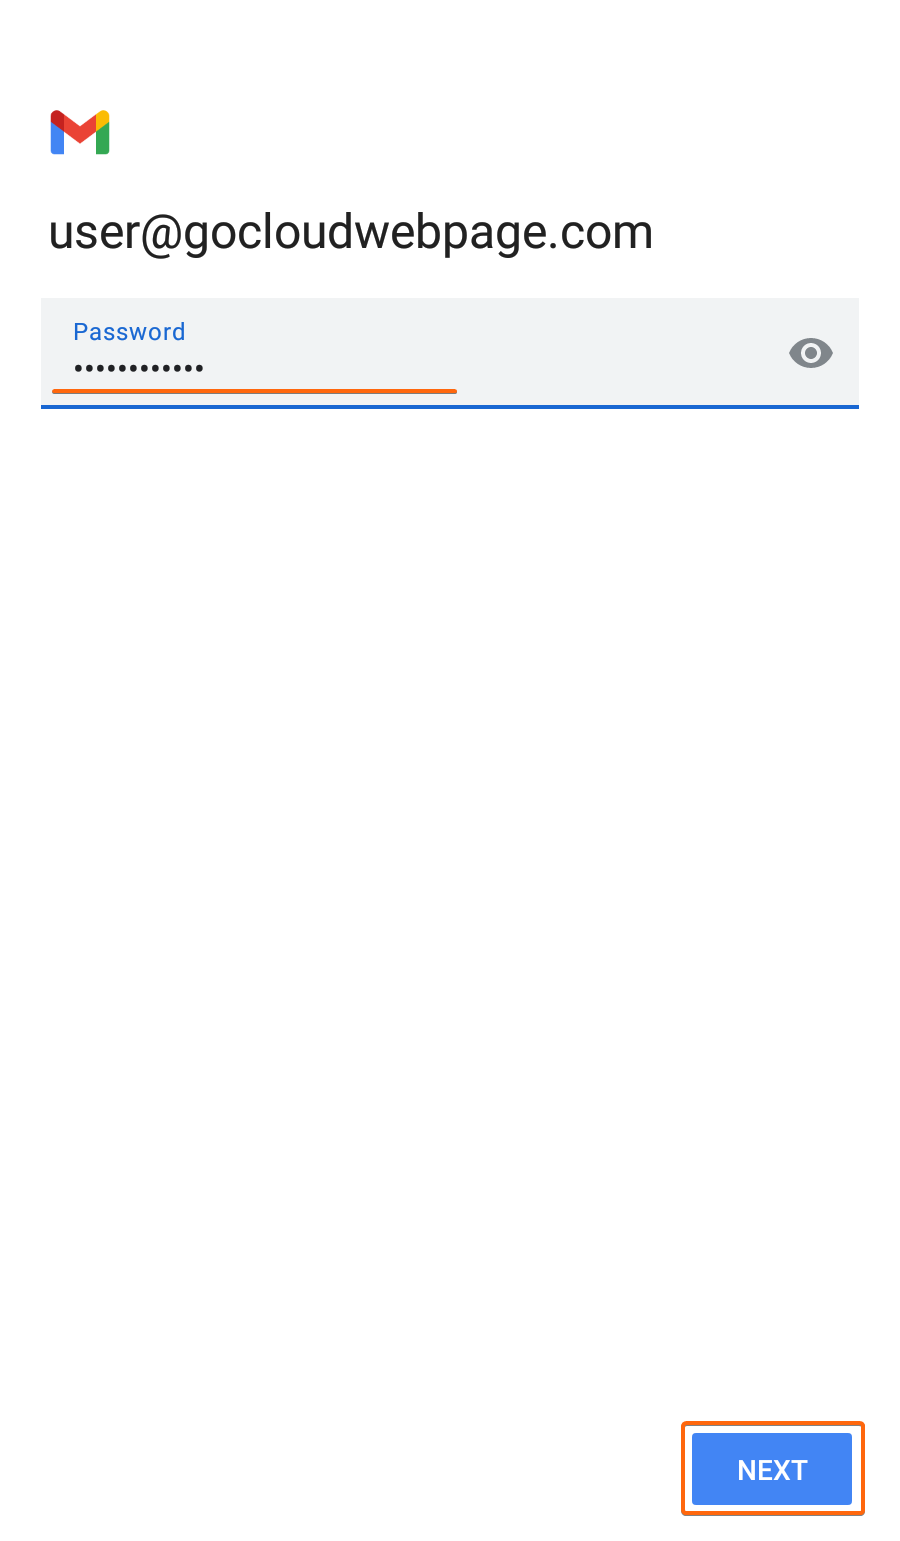
You will now be prompted to enter your password on this screen:
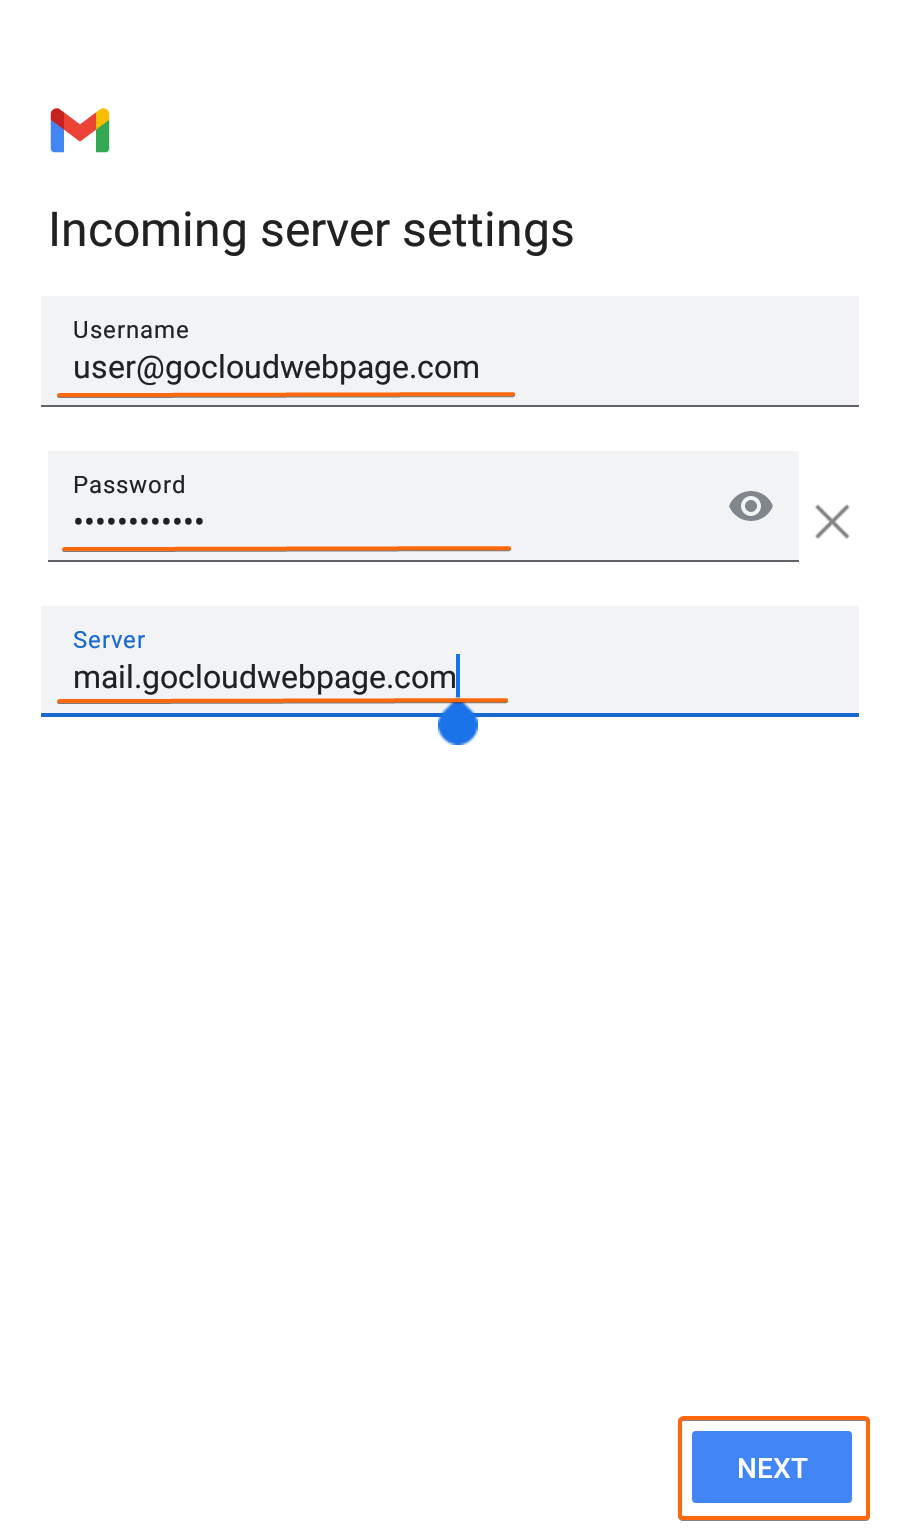
When you’re done entering your password, click on Next. - You will now have to set up your Incoming server settings on this screen.

Here are the settings you should use for a IMAP setup for your CLDY webmail:
Username: (your CLDY email address)
Password: (your CLDY email password)
Server: mail.gocloudwebpage.com (replace gocloudwebpage.com with your domain)
Make sure everything is completed before clicking on Next.
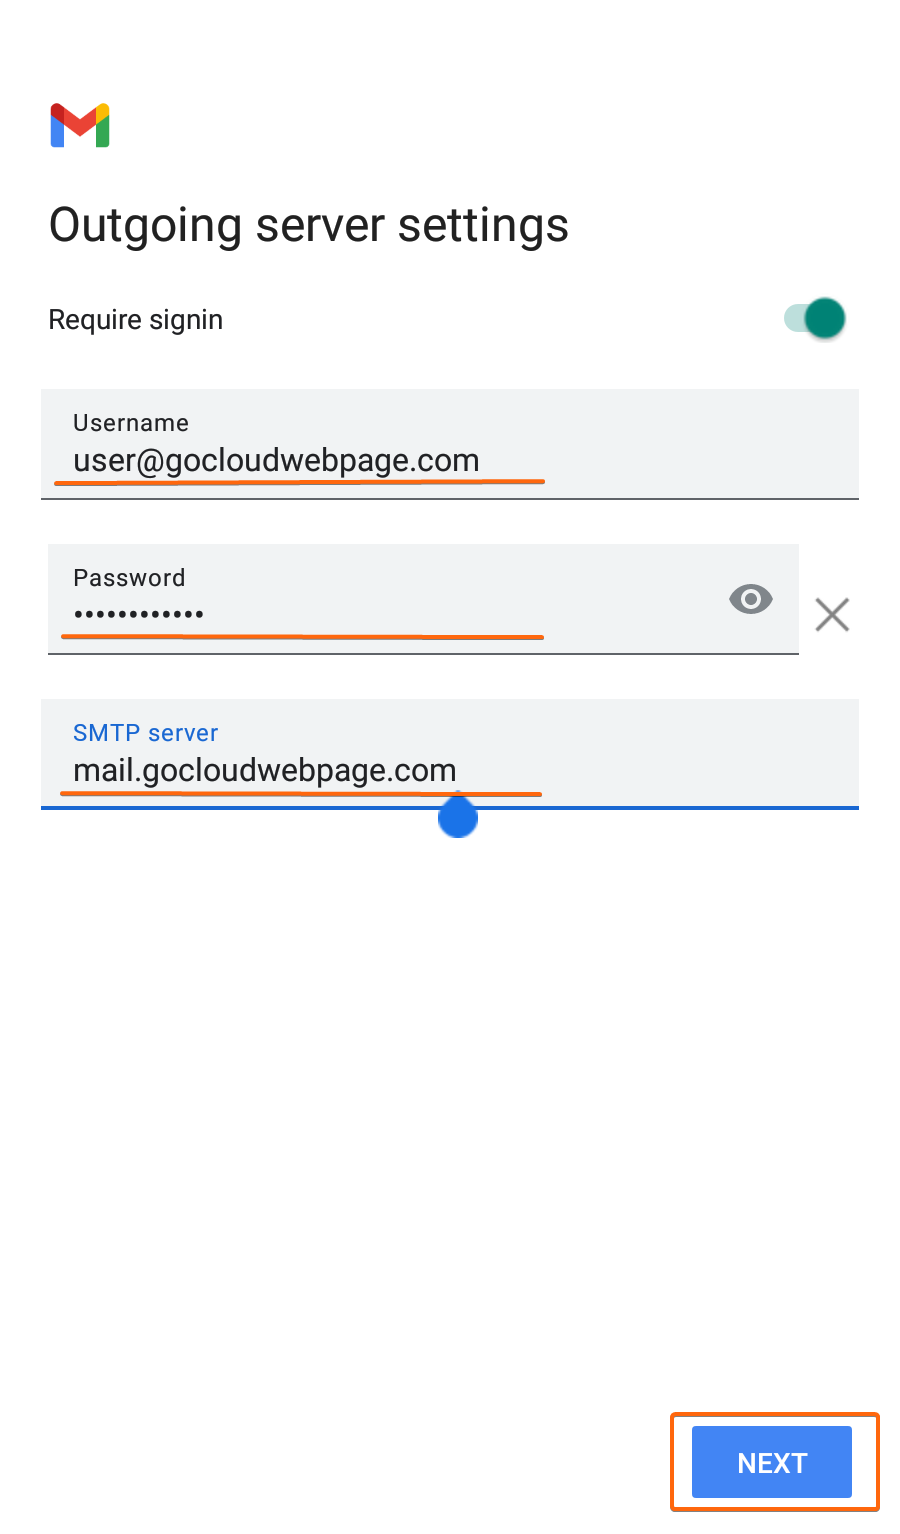
You will then see the Outgoing server settings screen.
Everything is basically the same information:
Username: (your CLDY email address)
Password: (your CLDY email password)
Server: mail.gocloudwebpage.com (replace gocloudwebpage.com with your domain)
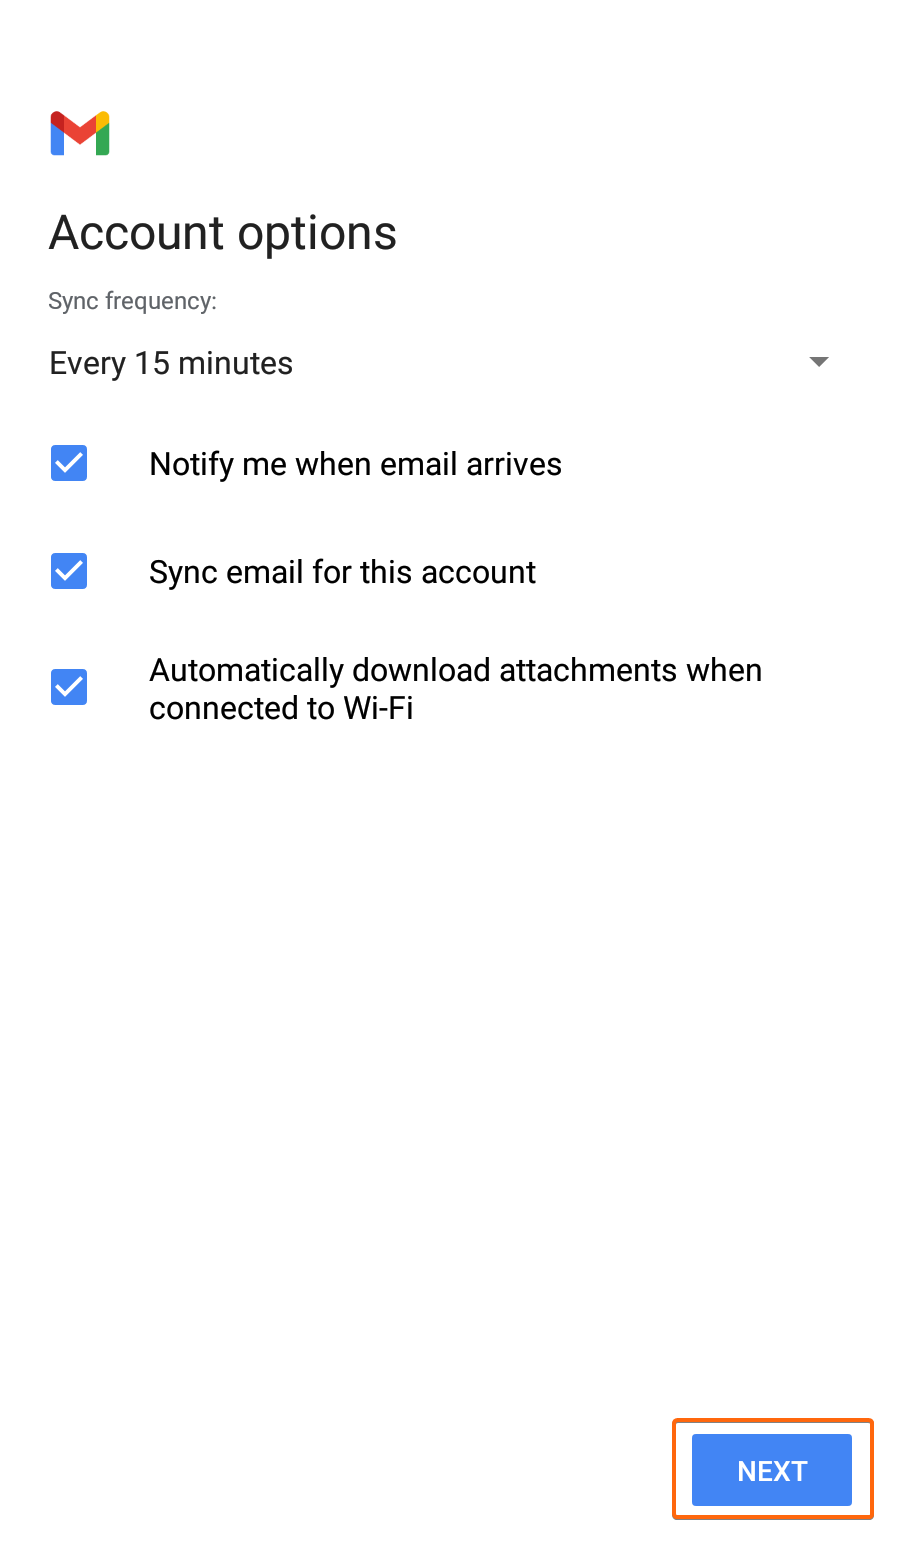
Fill in as required, then click on Next again. - Almost there! You now have to choose how you want your IMAP account setup – how frequent the sync will be from your server (options are Never, Every 15 minutes, Every 30 minutes, or Every hour); notification setting, and if you want attachments to automatically be downloaded when connected to a network.
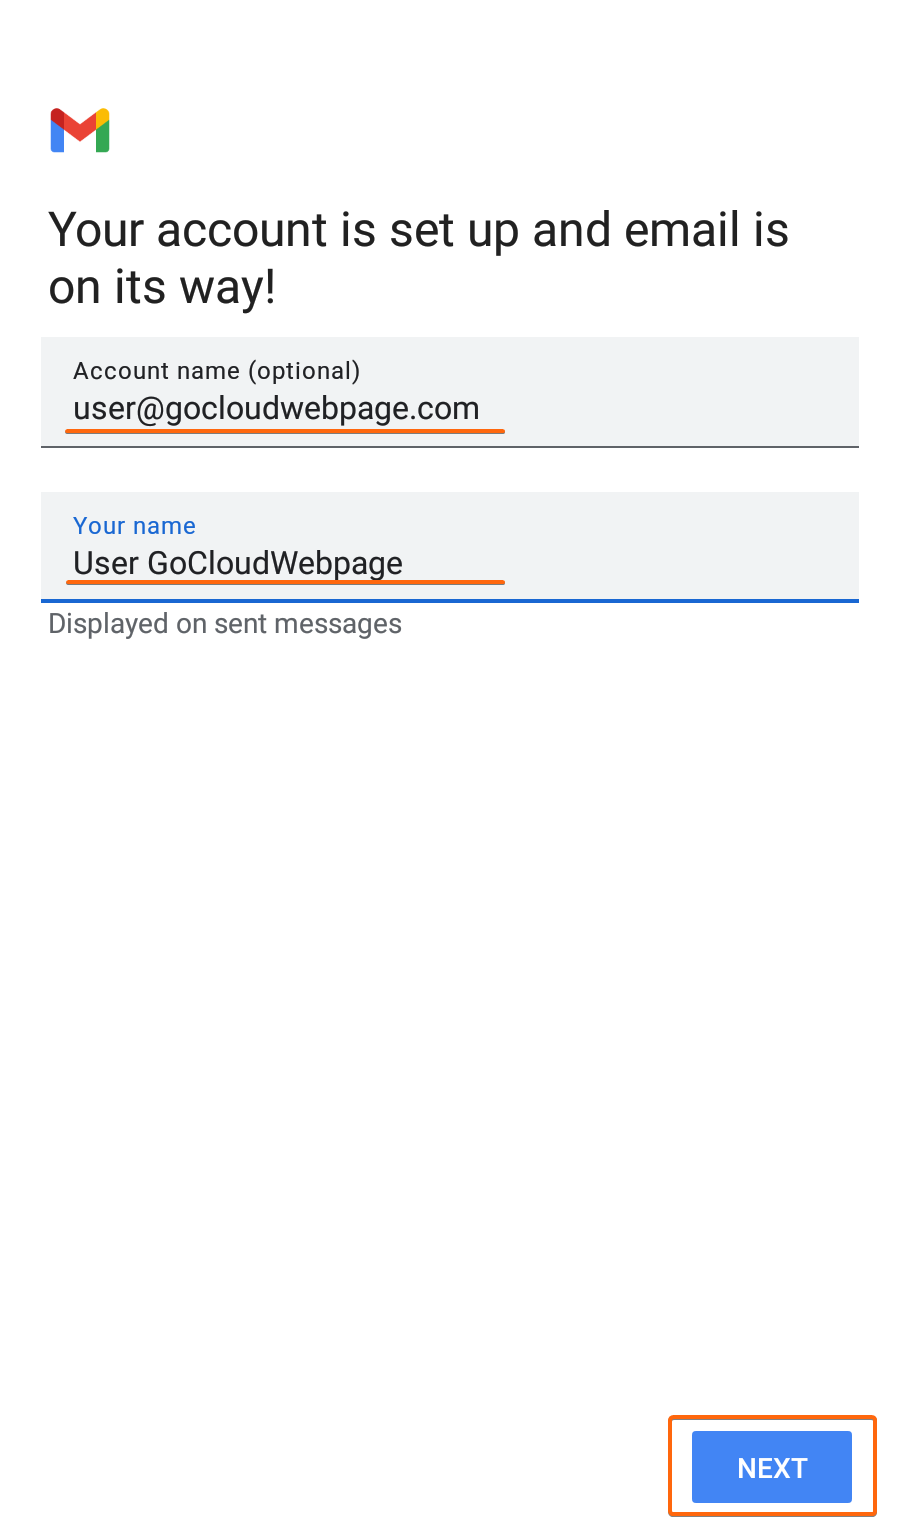
If everything is set, click on Next. - What’s left is to modify your Account name (optional), and Your name that will appear for your IMAP mailbox.
Your screen will go back to the Settings page. Your IMAP email can already be viewed below:
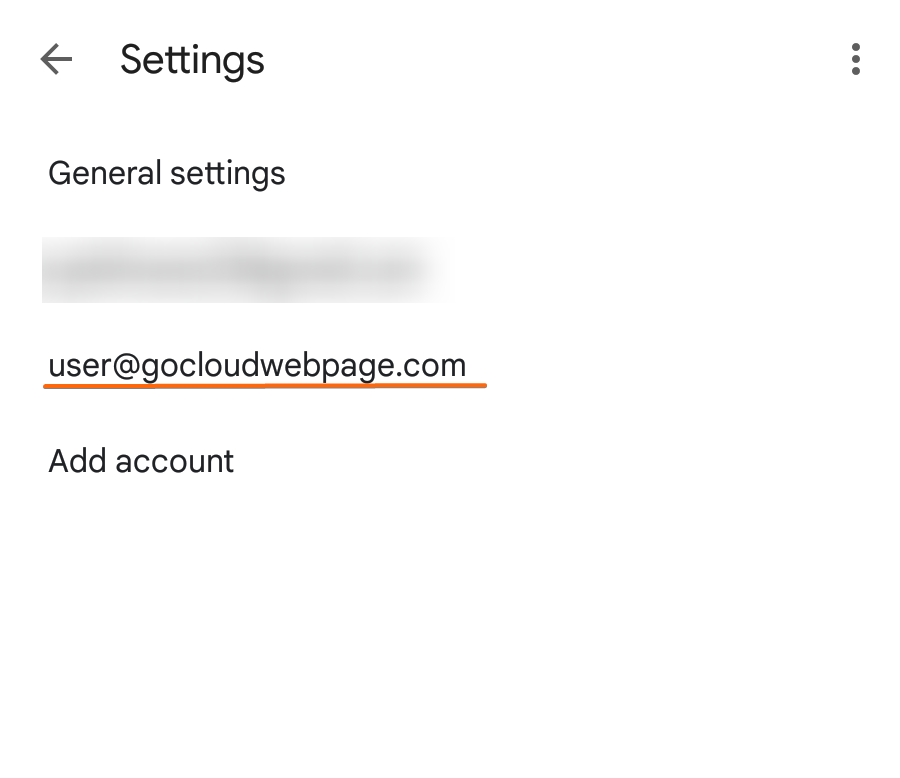
Since your IMAP email have its specifications, we recommend you proceed with the next steps. On the same screen, click on your IMAP email address, and you will be directed here: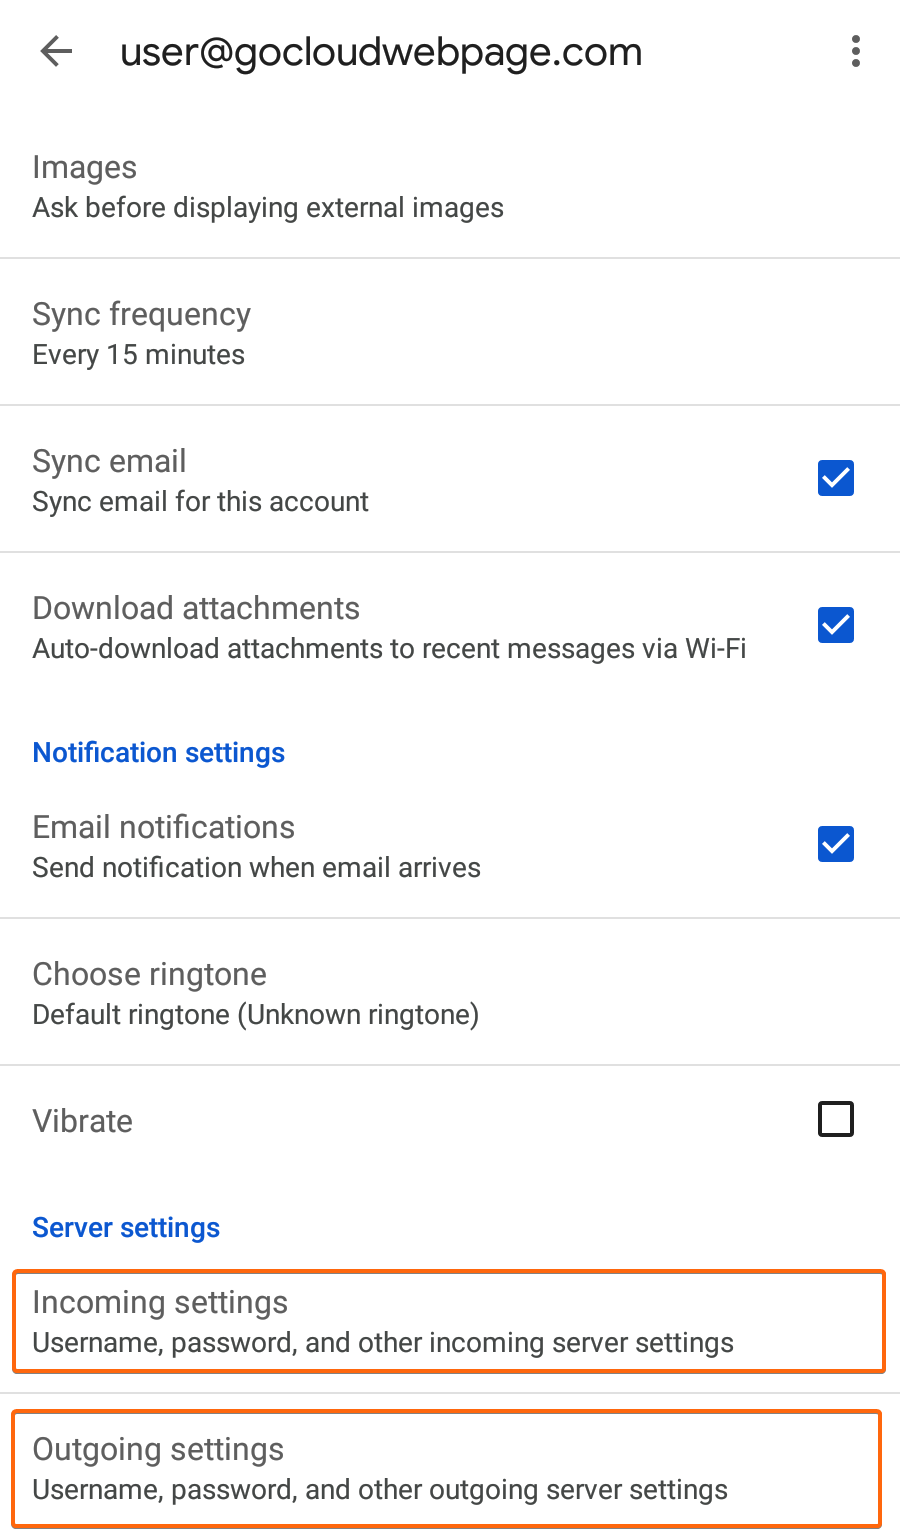
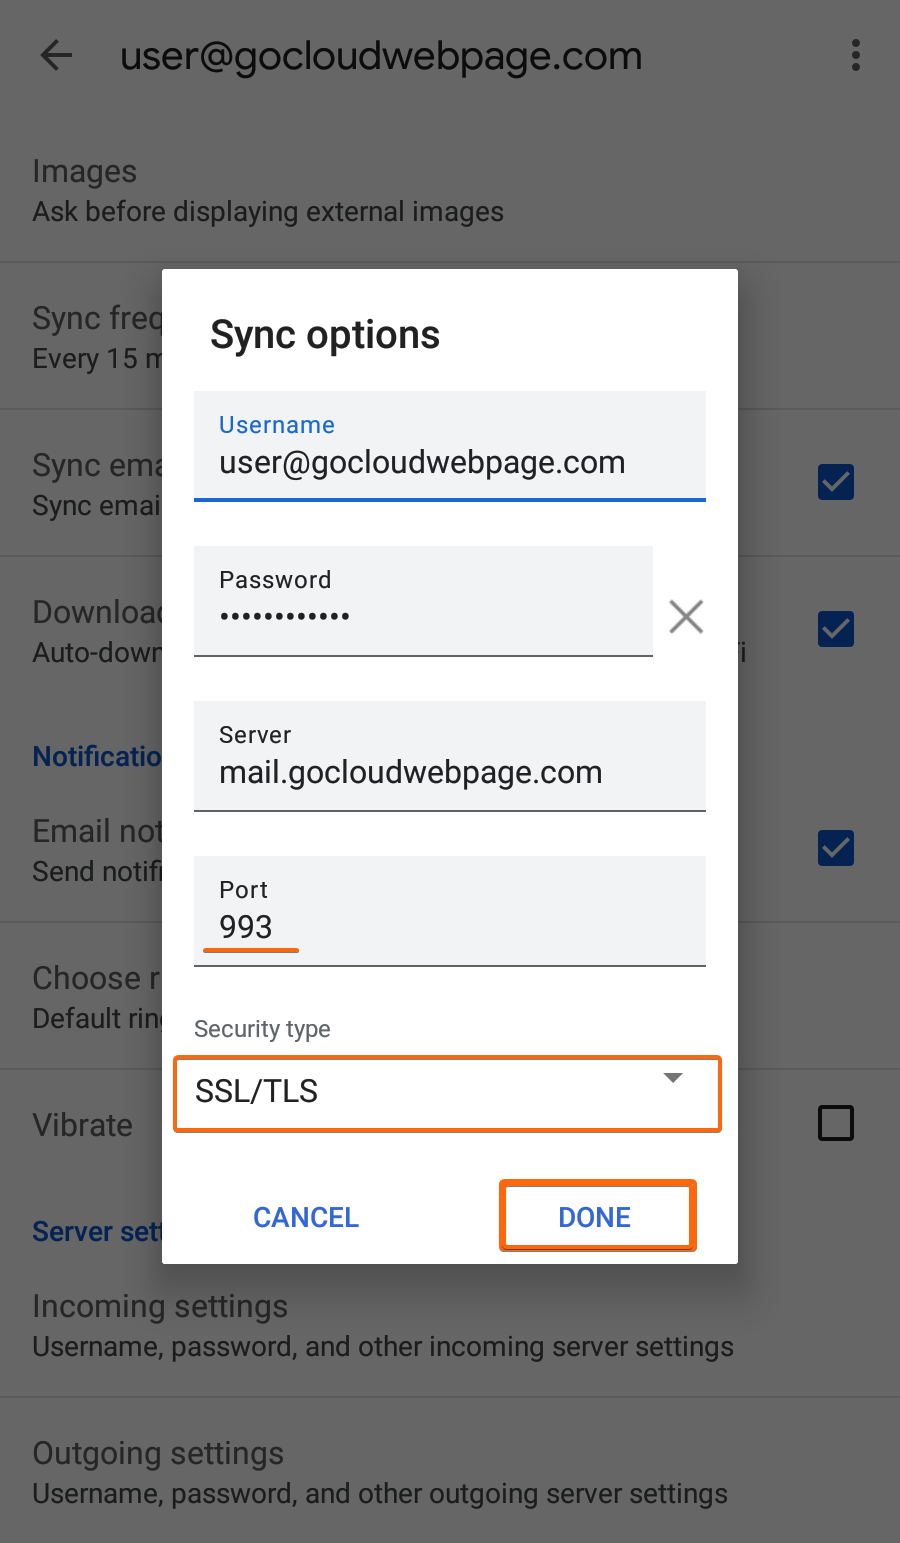
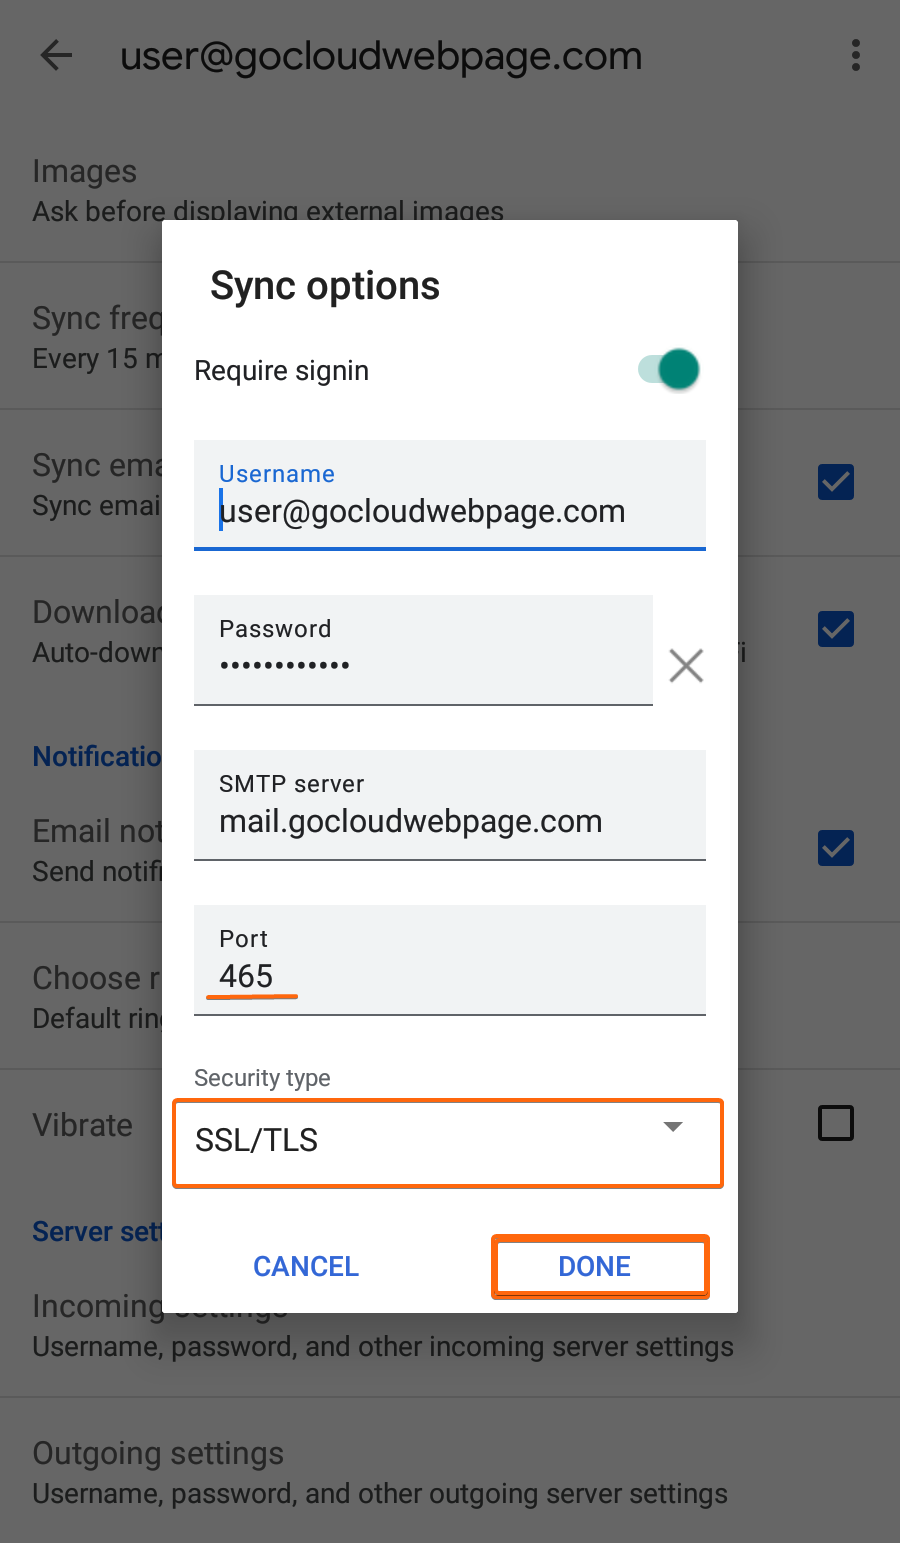
Take note of the following information to modify your settings accordingly:
Incoming settings
Port: 993
Security type: SSL/TLS
Outgoing settings
Port: 465
Security type: SSL/TLS