
No doubt, Internet speeds are getting faster day by day. But even with high-speed internet connections, you might still experience some lag between the request and completion of a web page loading. This is usually caused due to flash traffic or large files being transmitted over the web.
Proper TTL configuration must be set depending on your DNS settings. To do so, let’s take a look first at what TTL is.
What is TTL?
TTL stands for “Time to Live”. It refers to the specific time that a data packet can be retained in a computer or network before it gets discarded by a router.
The data is divided into chunks and sent out as separate packets. Each packet should have its own TTL value so that it can reach its destination quickly.
The idea behind TTL is to make sure that packets don’t get lost or rerouted without any information about where they came from or where they are going next. This ensures that packets are always routed correctly so they can reach their destination at their intended time and place without causing any delays or problems along the way.
Best Practices for TTL Settings and Configuration
- When should you set a higher TTL value?
- The recommended TTL value should be set at 24 hours (86400 seconds).
- A higher TTL value means you expect a stable response from your domain.
- There is less to no latency expected, and authoritative name servers will be queried less by frequently caching name servers.
- When should you set a lower TTL value?
- Any changes to your DNS record(s) must also have an equivalent update to the TTL settings.
- Update your TTL settings at least 24 hours before making any DNS changes. Set the TTL value to 5 minutes (300 seconds).
- Once the changes have been applied, set it back to the recommended TTL value of 24 hours (86400 seconds).
- A lower TTL value means cached records will expire more quickly and queries will be made more frequently.
- Note: For DNS records used for failover, keep the TTL to 5 minutes (300 seconds).
How to Change TTL Settings via cPanel:
1. Log in to your cPanel dashboard.
2. Under Domains, click on Zone Editor.

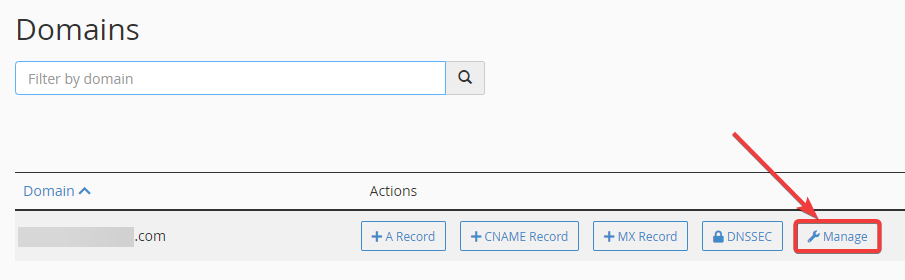
3. Select the domain that the DNS record is under, and click on Manage.
4. A list of your DNS records will now appear. Find the DNS record you will be updating and click on Edit.

5. Take note that if you will be making changes to a DNS record, you must set the TTL value to 5 minutes (300 seconds). Do this at least 24 hours before applying the changes.
![]()


