
BLACKLIST VS. WHITELIST
Blacklisting is when you want messages to be filtered, or removed so you will not have to do spam filtering when you browse through your mail. It is mostly used as a security measure, this way you will also not be opening nonessential and unwanted emails.
Whitelisting, on the other hand, is the opposite of blacklisting – these are the emails that you want to accept. The senders of these emails are who you verify to receive messages from, as deemed acceptable for your platform.
WHAT IS SPAMASSASSIN?
SpamAssassin is a free software which helps you to filter your blacklist and whitelist roster. It mainly helps out in reducing your emails down to what you want to prioritize. It also refines your inbox into a more organized system that will make your life easier. Here are the steps to whitelist or blacklist email address(es) on the mailbox linked to your cPanel.
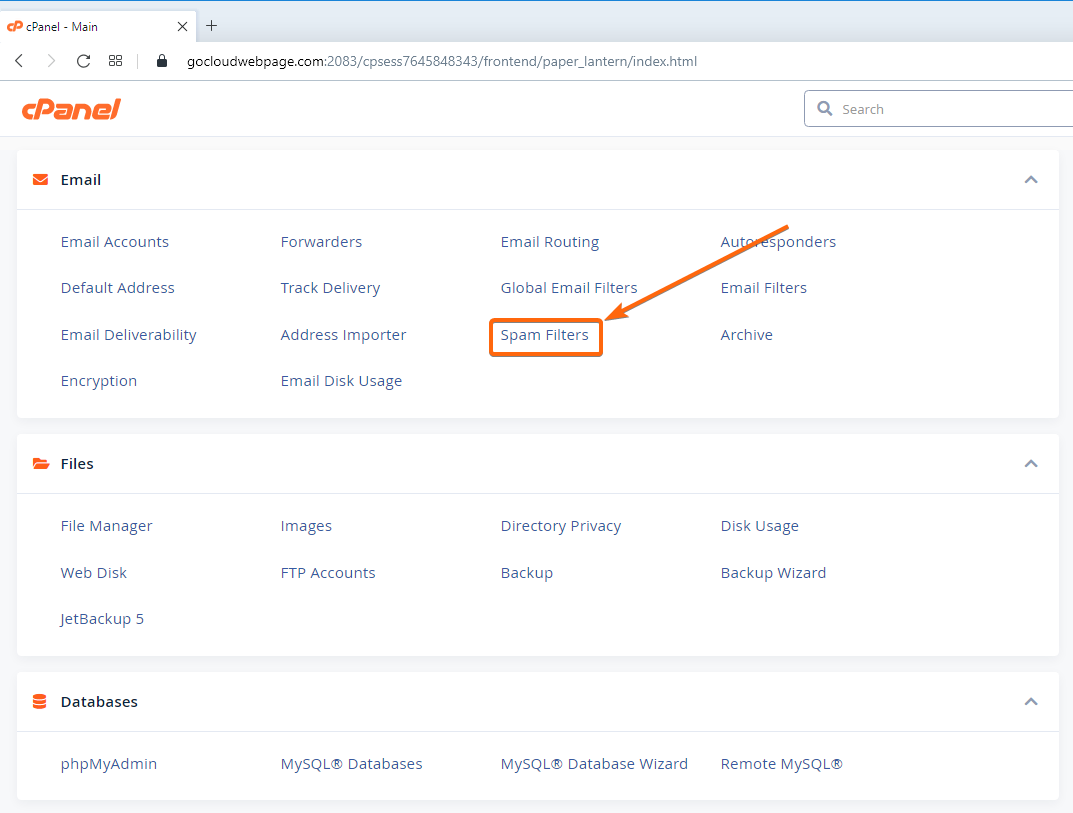
- Log in to cPanel.
- On your cPanel homepage, go to Email, and click on Spam Filters.
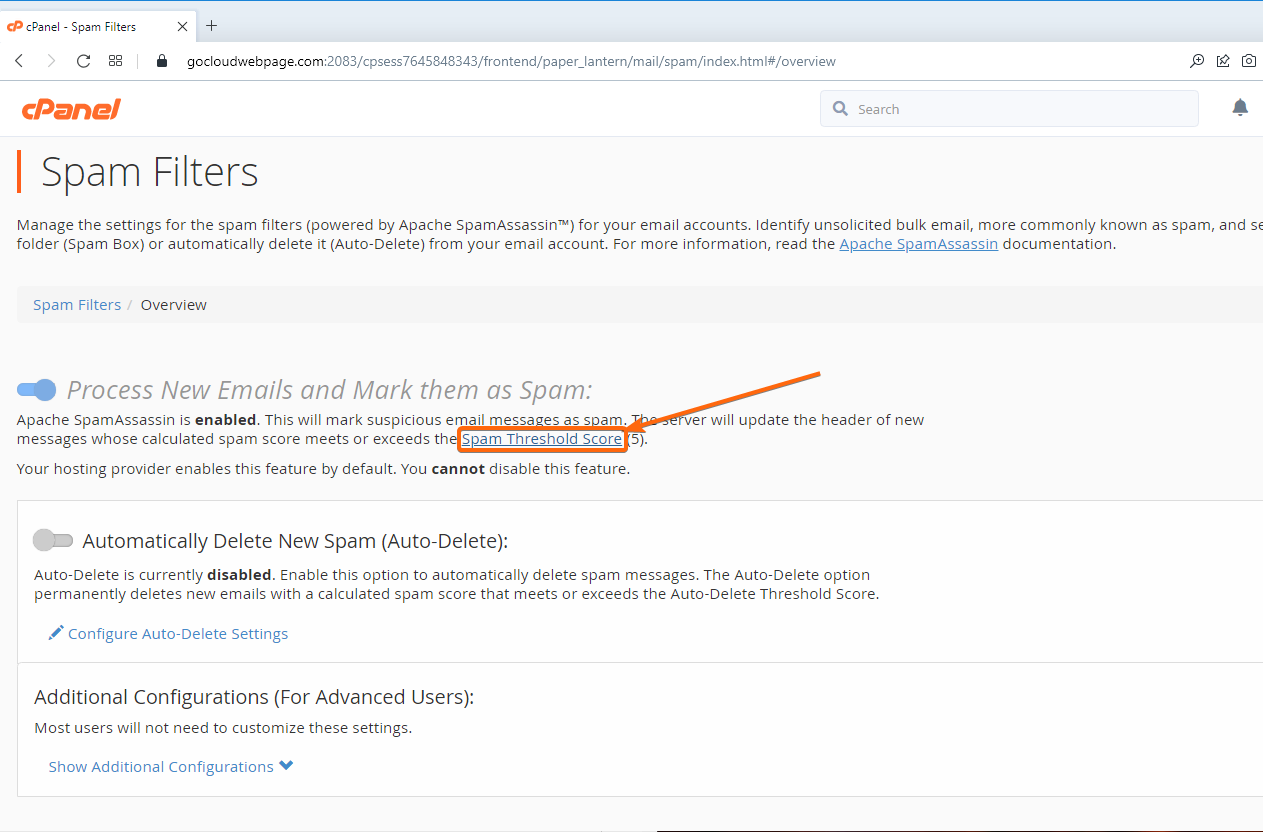
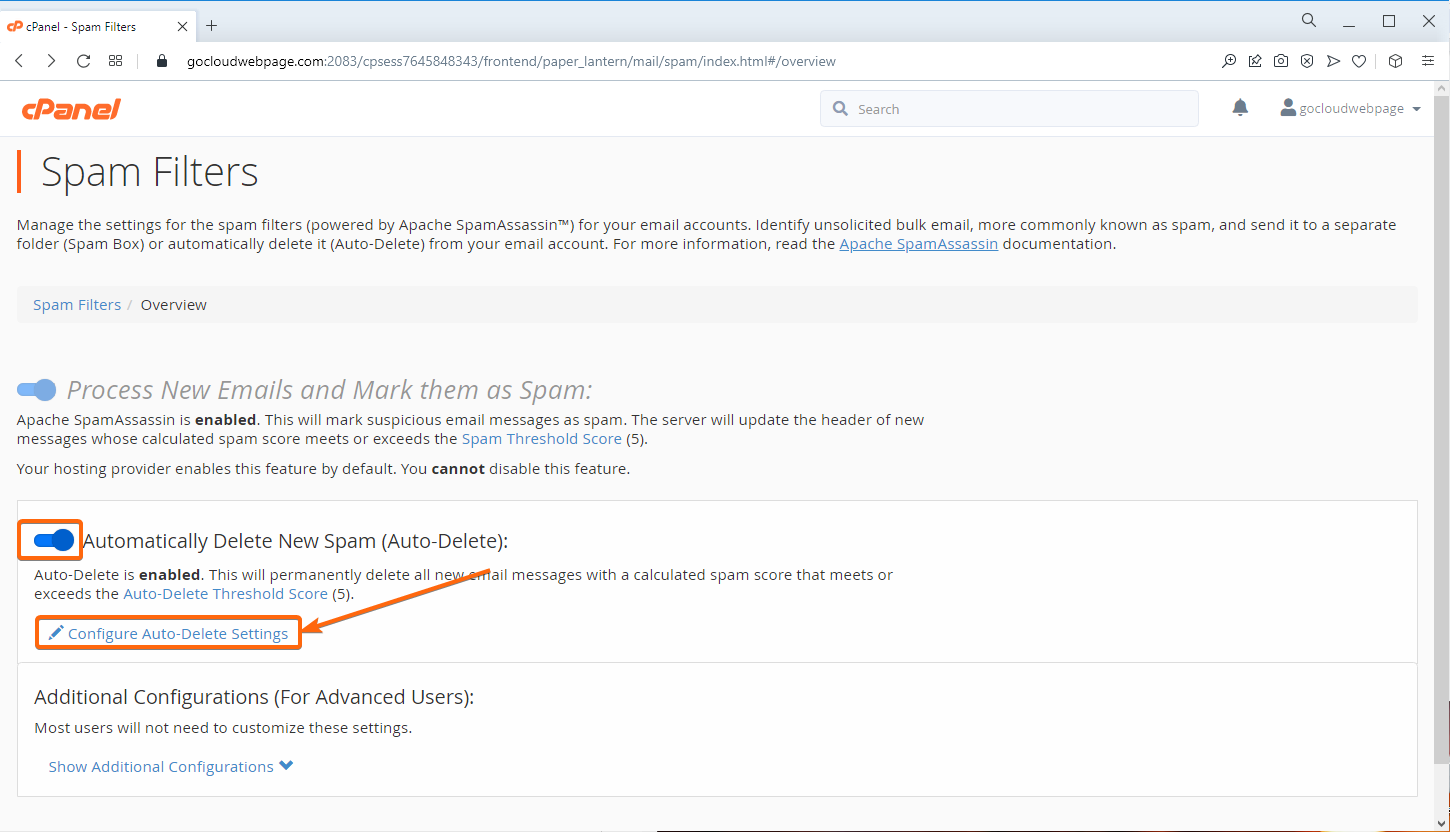
- Web hosting through CLDY automatically enables SpamAssassin by default, and cannot be disabled manually. You will not be able to modify this feature, but what you can change is the Spam Threshold Score.

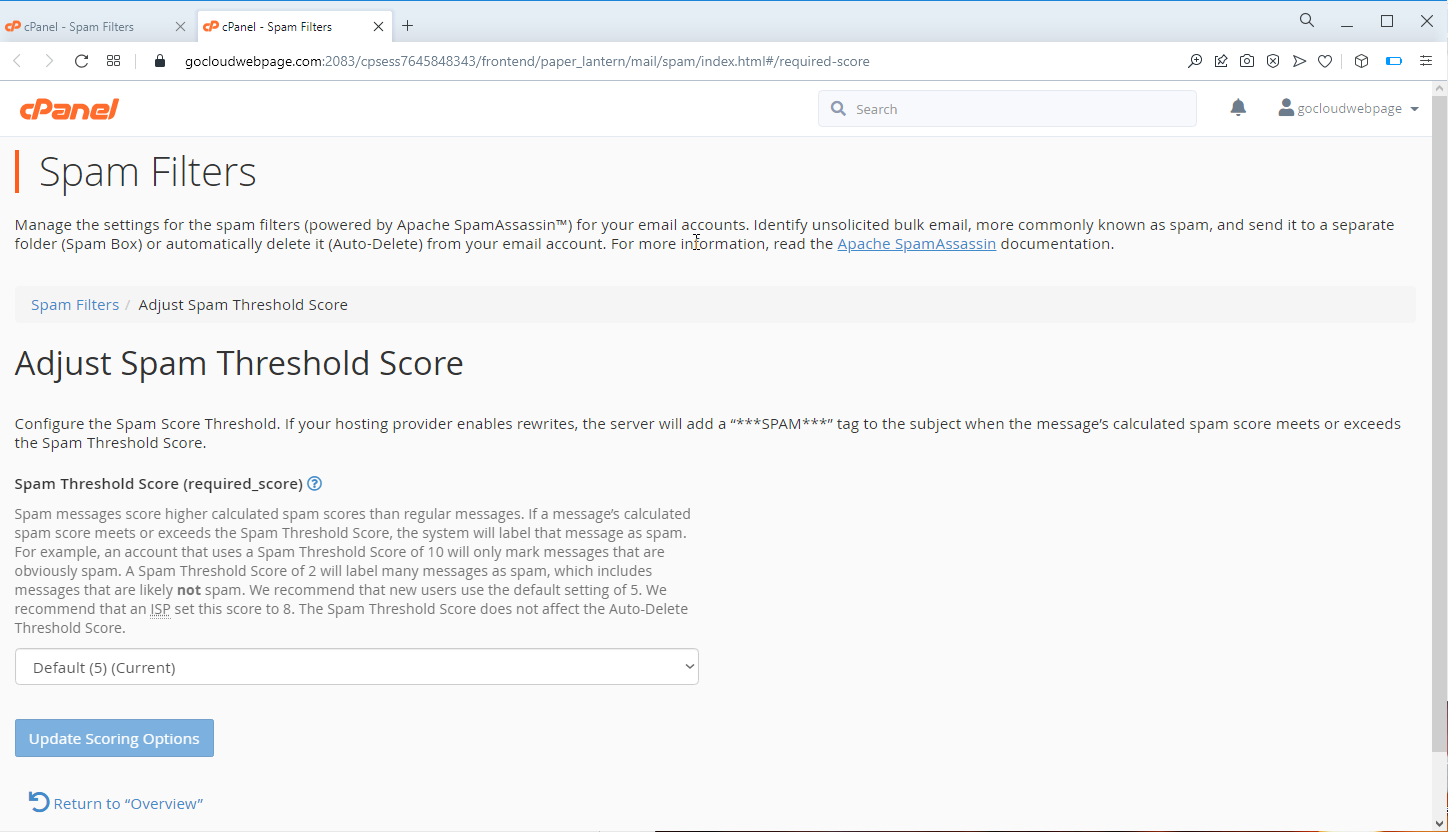
Clicking on the Spam Threshold Score will redirect you to this page:
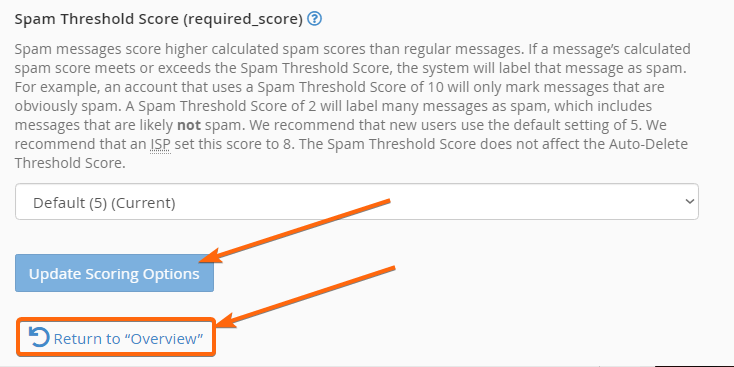
You want to set a lower number filter to heighten the security and filter of your messages, but this may also increase the possibility of legitimate messages to be filtered as spam instead. The default and recommended setting is 5, but you are free to change it to a lower or a higher threshold score depending on the types of emails that you get. If you are set, you can Update Scoring Options, and Return to Overview to go back to the Spam Filters page.
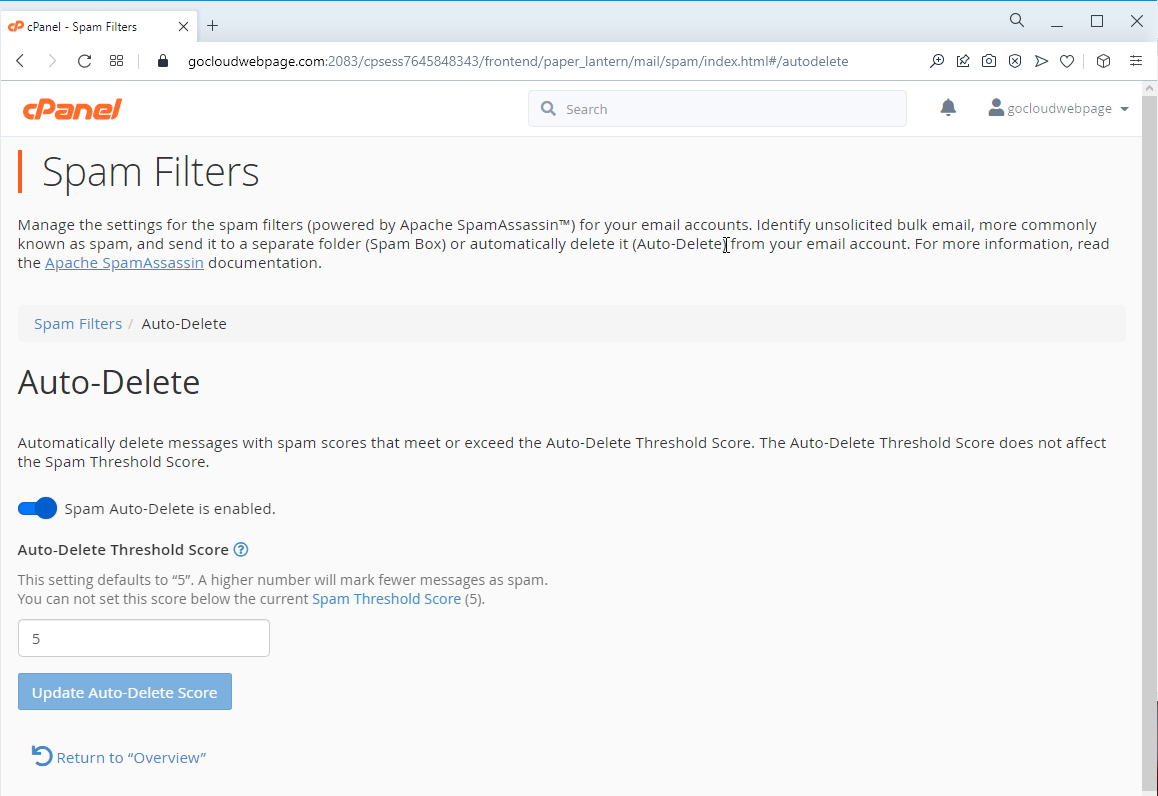
- The next setting is to enable/disable Automatically Delete New Spam (Auto-Delete). All emails that have the same or higher score as your spam threshold will be deleted right away.

You can set your Auto-Delete Threshold Score to a different setting then your Spam Threshold Score, but it cannot be lower than the spam threshold.
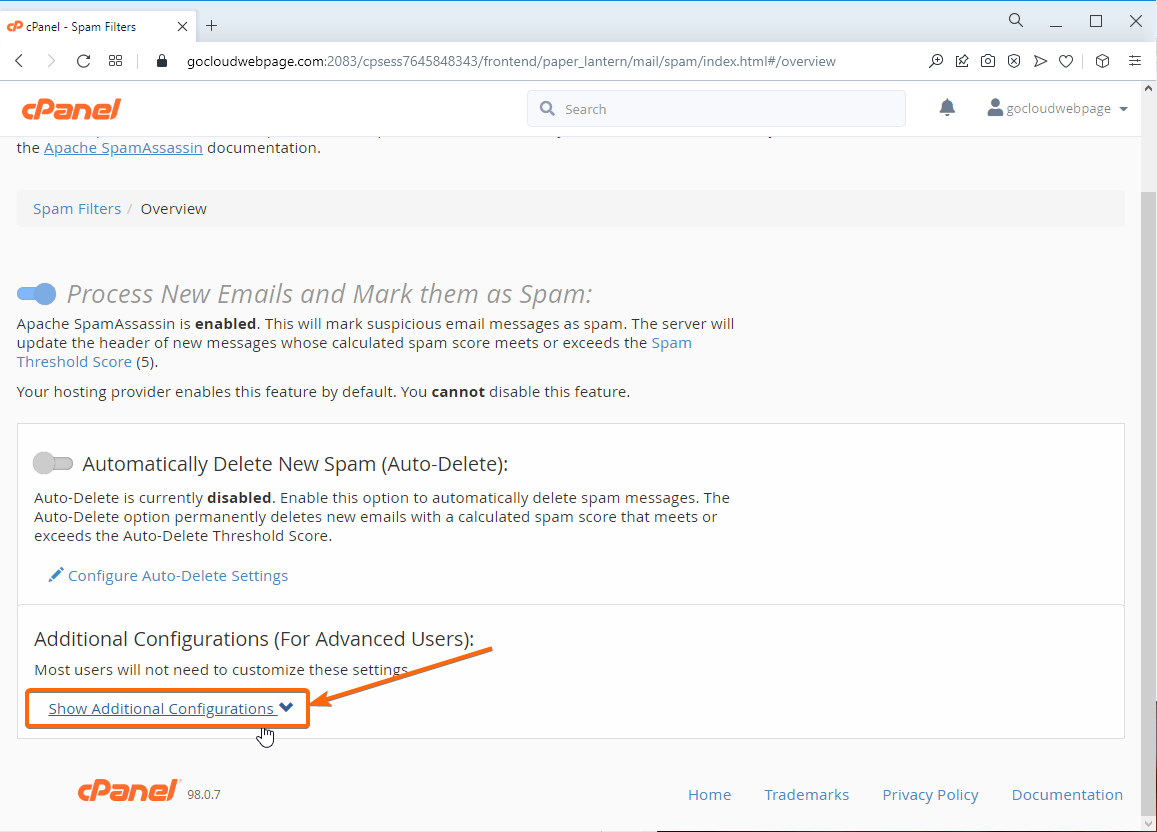
- To setup your whitelist and blacklist settings, you have to go back to the Spam Filters page, and click on Show Additional Configurations.

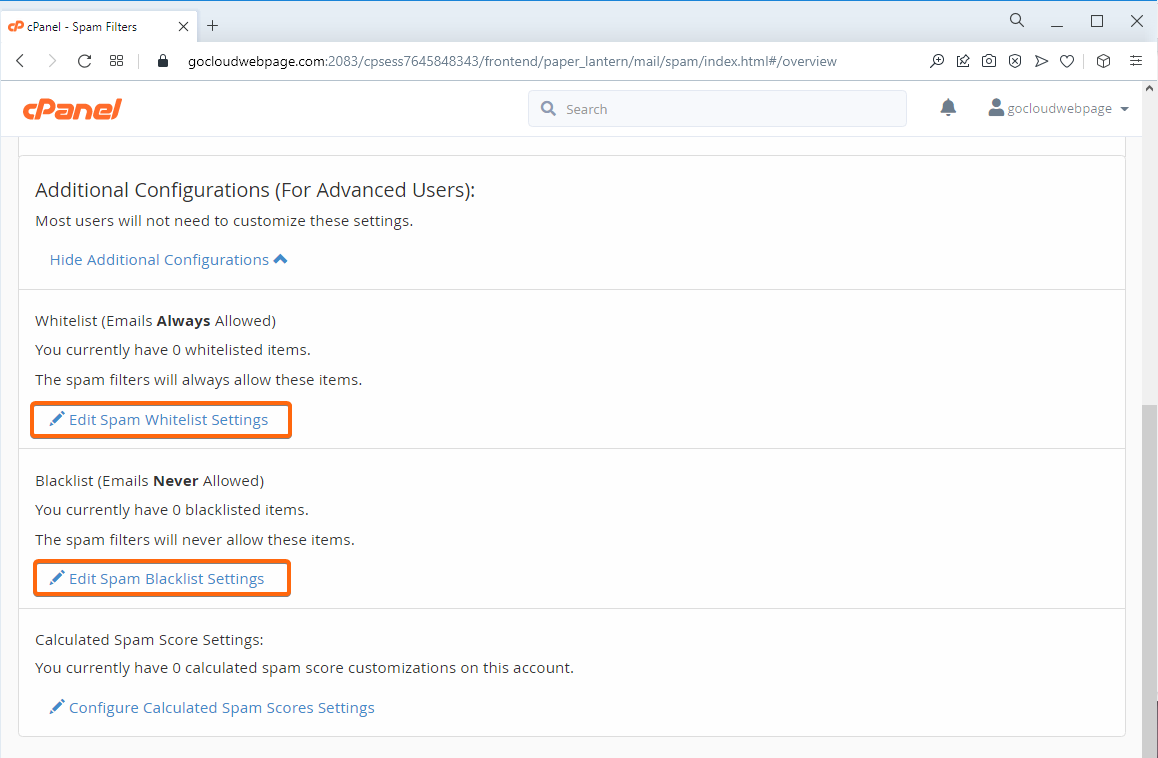
This screen should appear:
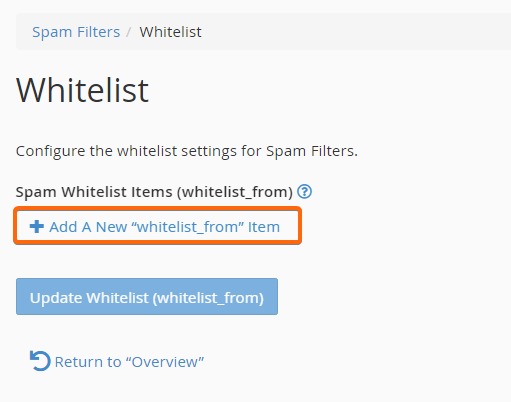
Edit Spam Whitelist Settings
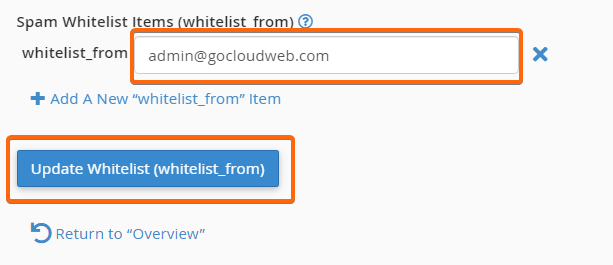
– By clicking on the Add A New “whitelist_from” item, a text box will appear for you to type in the email address you want included:
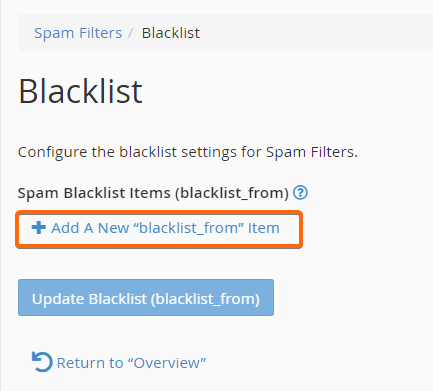
Edit Spam Blacklist Settings
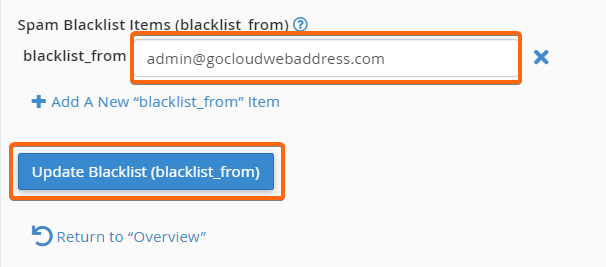
– The same applies when you want to blacklist email messages from another address, and click on Add A New “blacklist_from” item.
You can add as many emails as you prefer, and click on the Update Whitelist / Update Blacklist button once you are done.
Once you have these configured, these new settings will automatically be saved and will
be applied to your mailbox right away.


