Setting A Limit For Message Size
Restricting message size limits is not bad as it sounds – it’s actually helpful in managing your mailboxes to make sure all email messages over the Internet go through smoothly.
Here is the rationale behind it:
- Just as in transferring files from a computer to a drive, sending large files over email will take time. And if all messages contain huge chunks of attachments, servers would experience delay in sending messages to and from different email addresses.
- Mailboxes have limited space allocated for each user. So, you want to make sure that you do not, and your users also do not, use up that space in a single email.
- Assigning a message size limit is also a security measure. It’s a precaution to ensure that data such as program files cannot be easily sent over email.
Here’s how you can do it in Office365:
How To Restrict Message Size Limit In Office365?
- Log in to Office365.
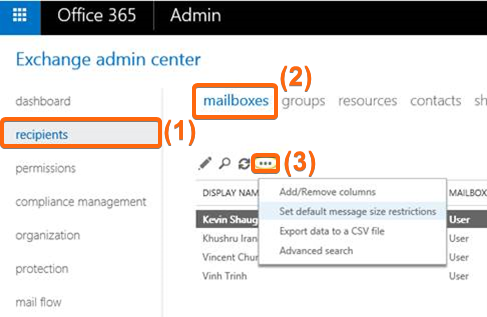
- Go to Admin, and you should see the Exchange admin center.
- From here, click on recipients, then select mailboxes.

Under Mailboxes, click on the dotted lines to display the menu and click on Set default message size restrictions.
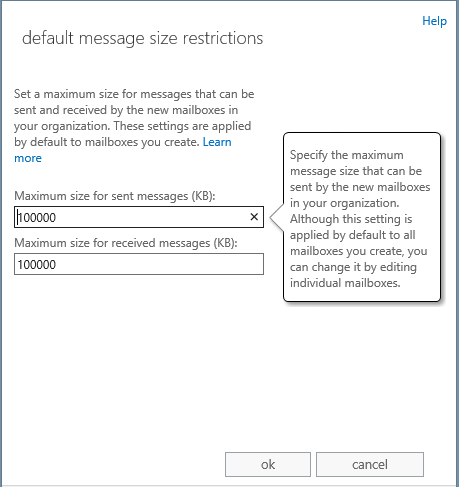
- You can now set the default message size limit (in KB) for all incoming and outgoing messages. Once done, click on ok.

- Here’s how you can modify settings for multiple mailboxes:
- Go to the Exchange Admin Center, then recipients and mailboxes.
- Select multiple mailboxes.
- Go to the Bulk Edit pane under Message Size Restrictions.
- Then click on Update.