WHAT IS A FORWARDER?
A forwarder, or a forwarding email address, helps you redirect the emails coming into your domain to another email address.
A domain forwarder, on the other hand, redirects your messages from the receiving domain, to another domain which you want it forwarded to.
Forwarders, in general, allow you to divert your messages to a different route (in this case, another email address or domain), so all of them can be accessible through one source, for your convenience. If you also don’t want to use up your web hosting space too much, then forwarding is the way to go.
HOW TO CREATE FORWARDERS?
- Log in to your cPanel account.
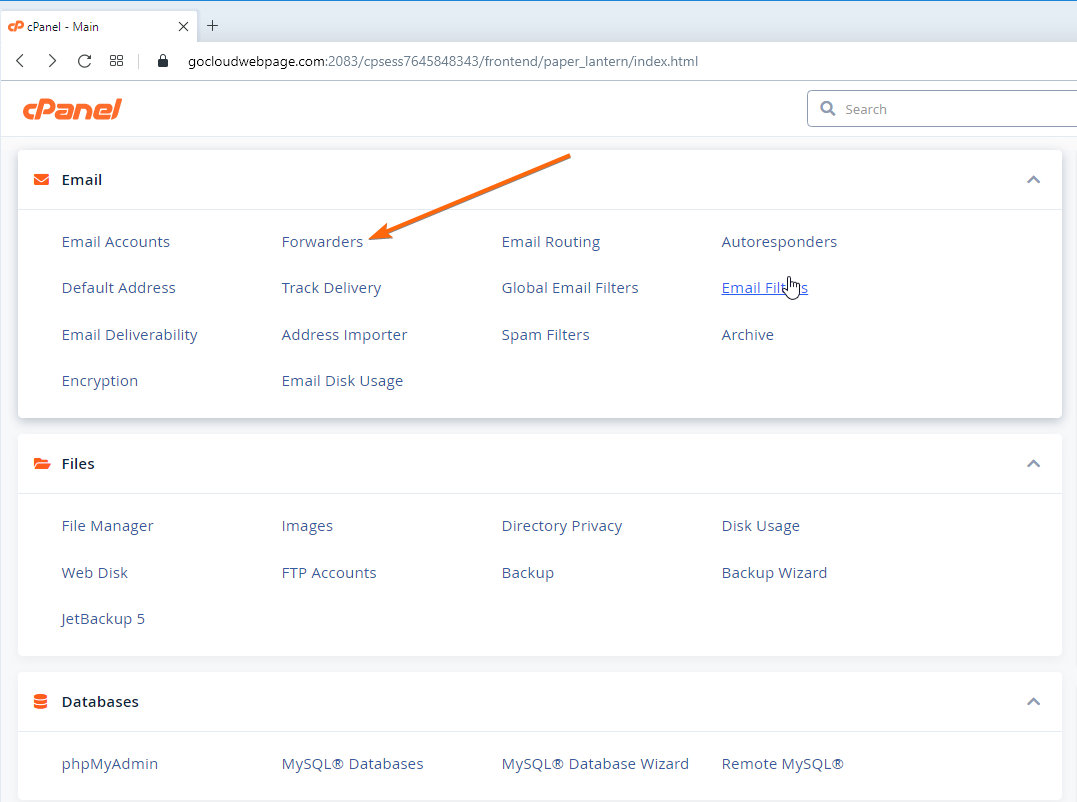
- Under Email, click on Forwarders.

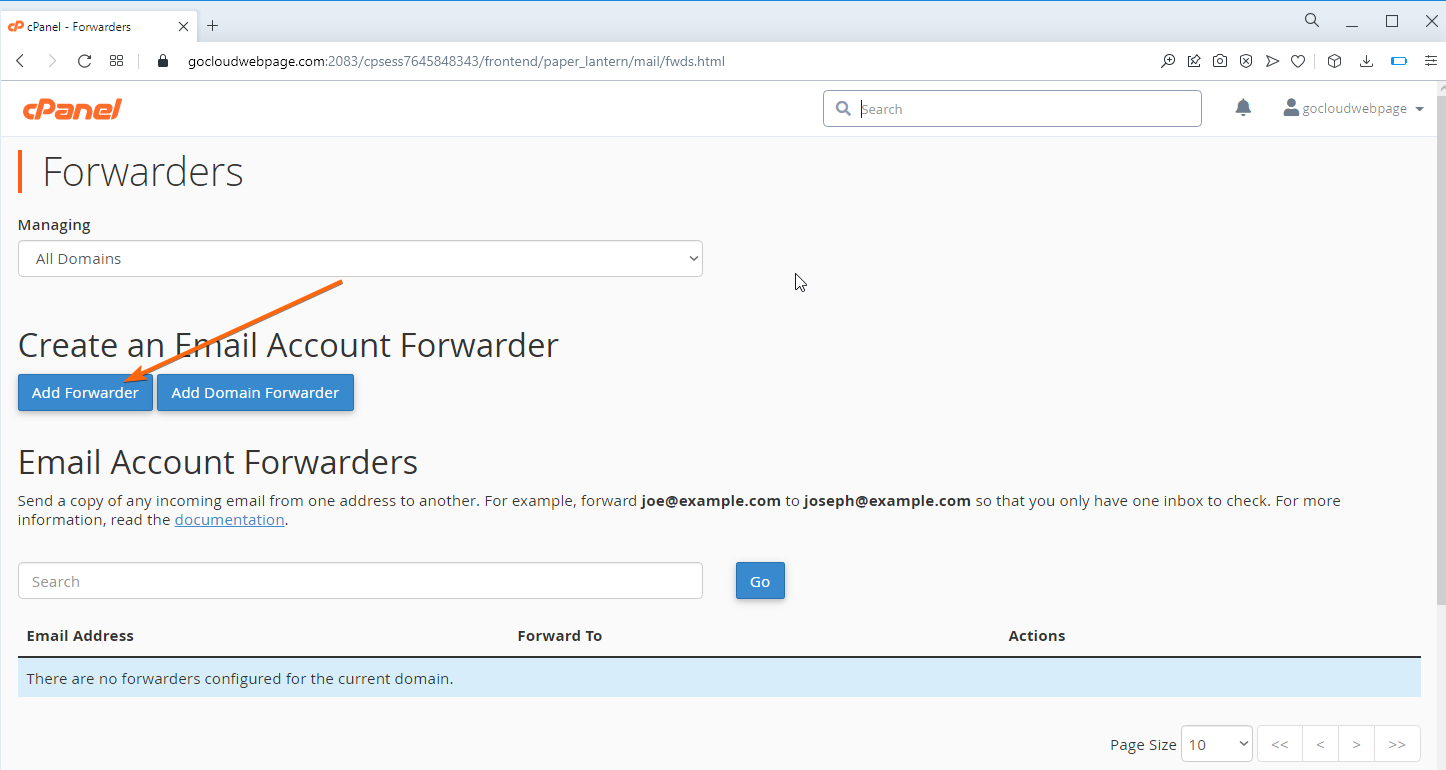
- Select which forwarder you will be creating:
- Email account forwarder

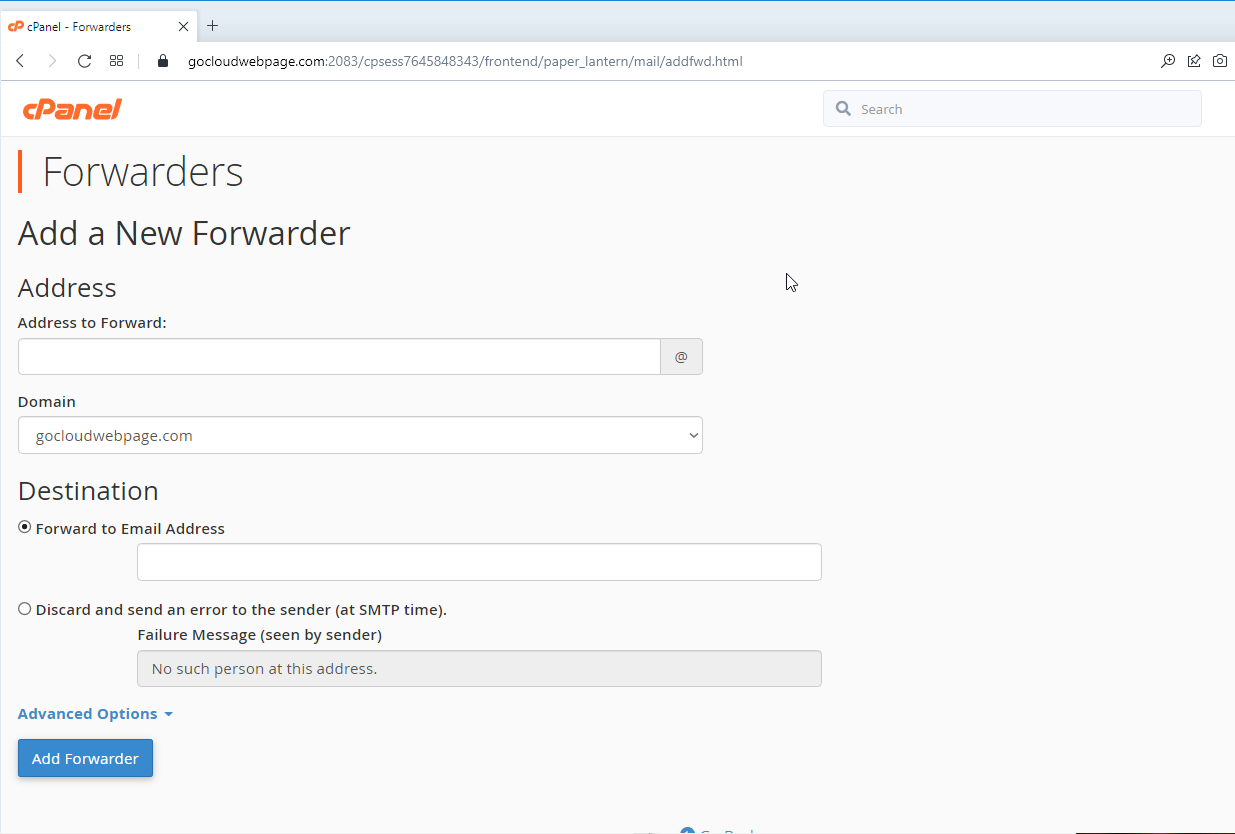
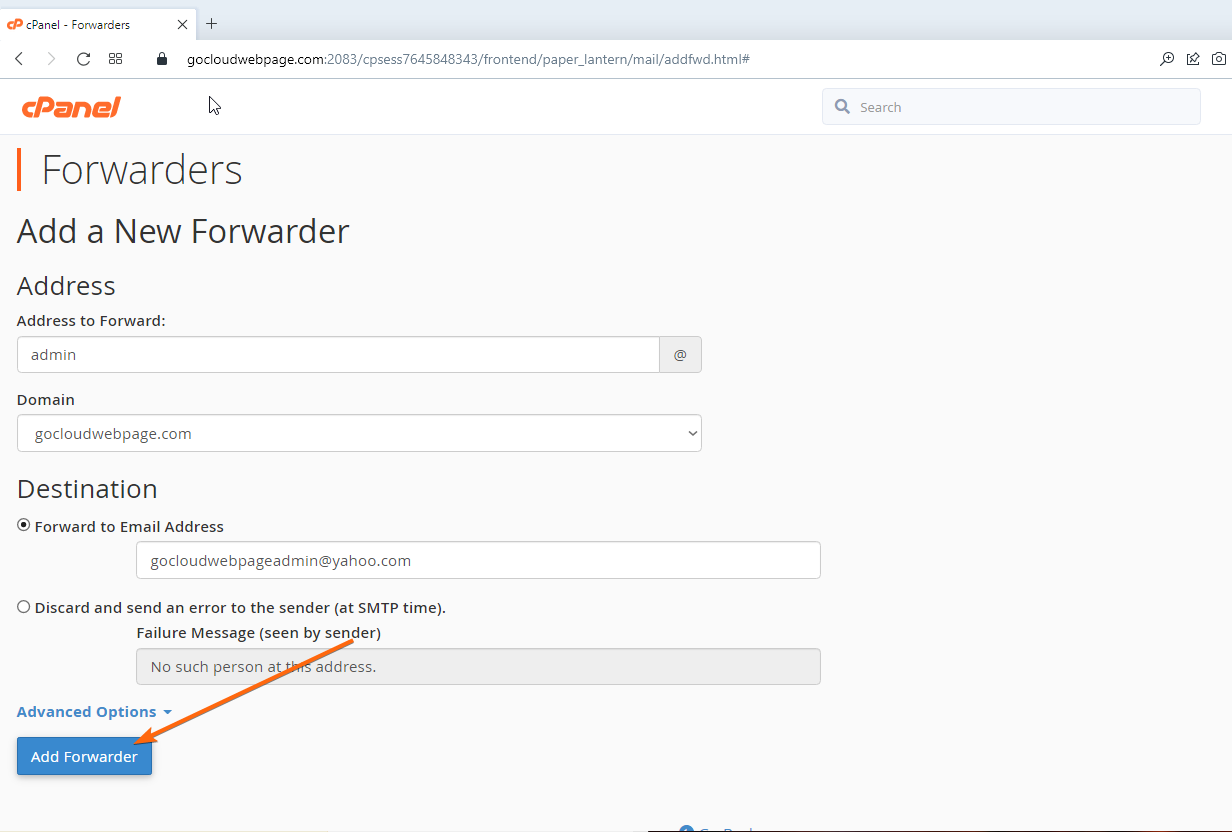
Fill out the email information you want to forward. If you have more than one domain, you can select it from the Domain dropdown, as well.
In the Destination section, the radio button for the Forward to Email Address is clicked by default. Indicate the email address which the messages to be forwarded to.
The Discard and send an error to the sender (at SMTP time) option can be chosen if you want the email address to be tagged as defunct by the sender, and have them resend their message to another email address within your domain.
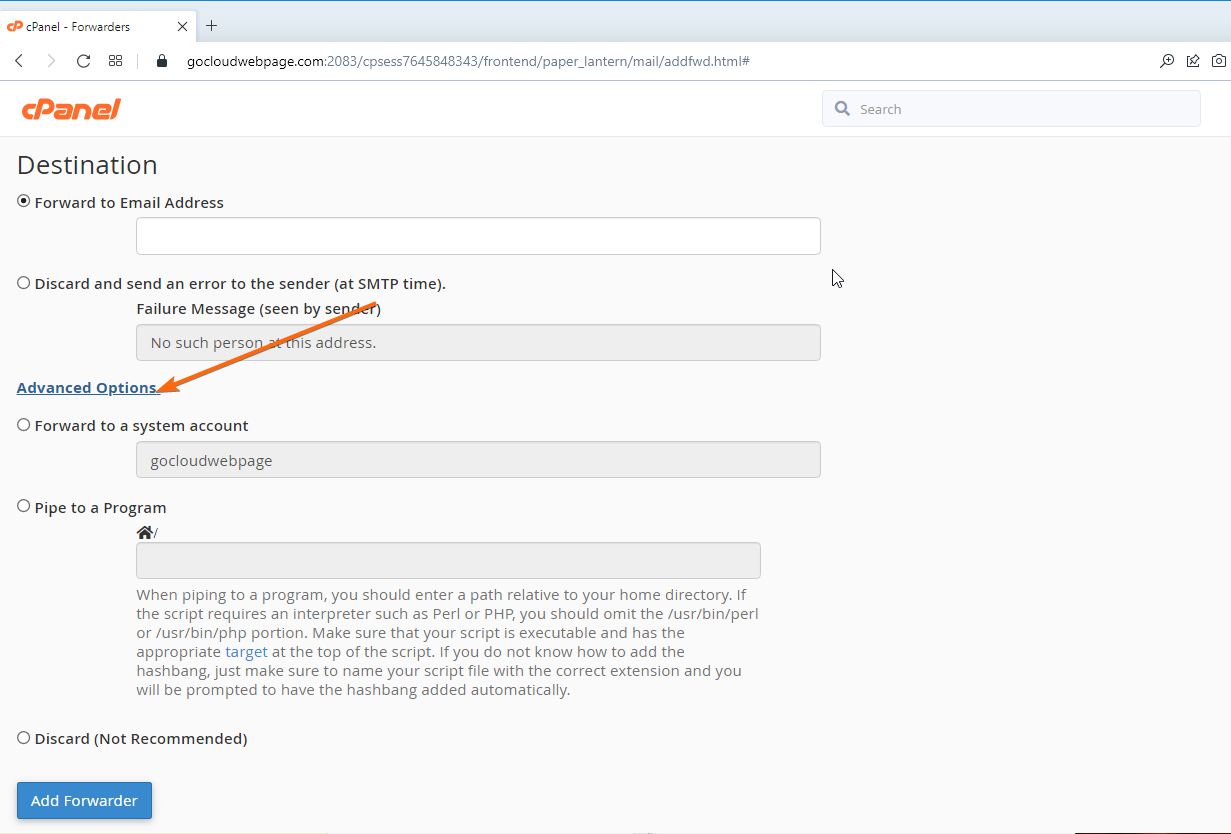
For the Advanced Options, you will be given three additional choices:
You can select Forward to a system account if you want the messages routed to the central domain mailbox. Pipe to a Program can be chosen as long as the guidelines stated under the tickbox are met (script is executable, appropriate target, correct extension). The last one is to Discard (Not Recommended). As stated by the option, it is not suggested as it will get rid of the message immediately.
Once you have completed all the required information, you can now click Add Forwarder.
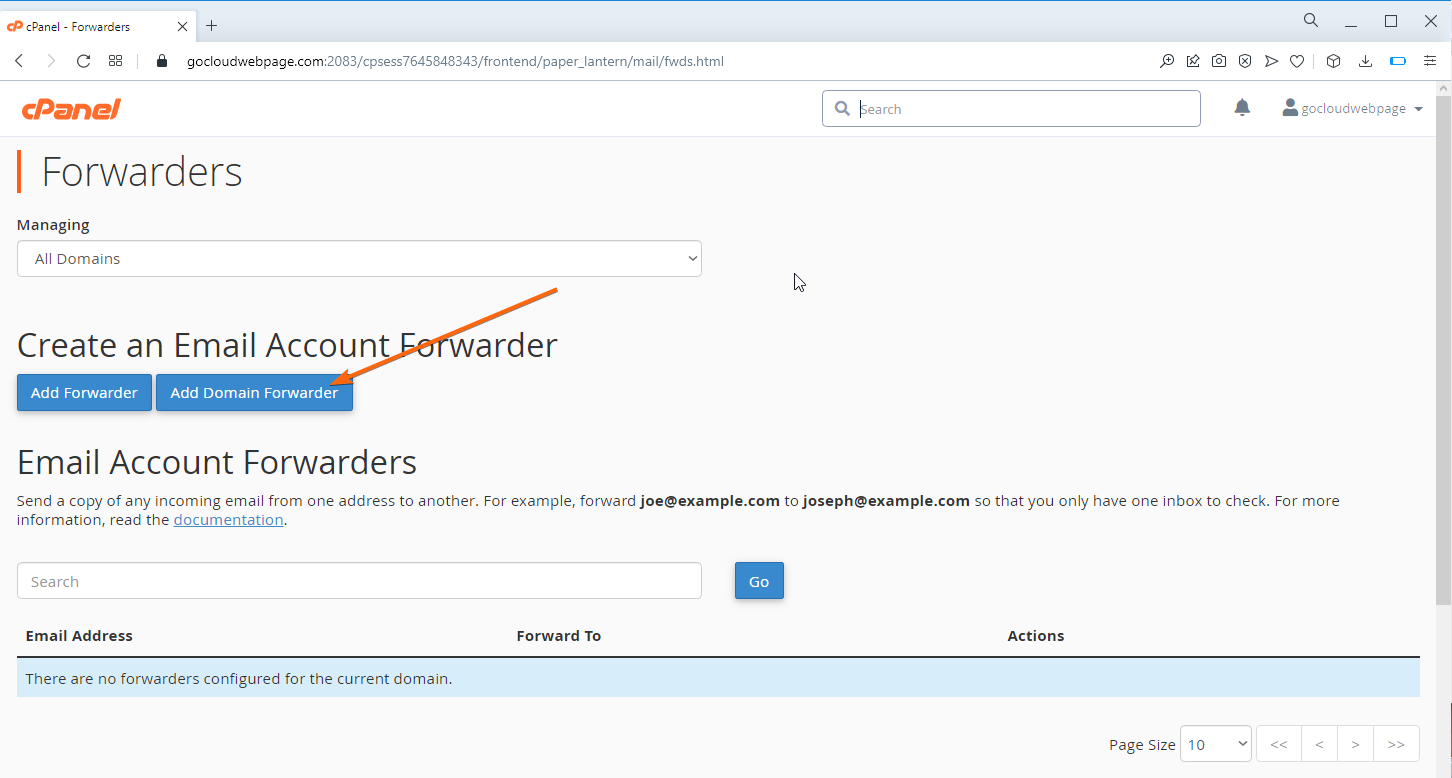
- Domain forwarder
On the Forwarders page, select Add Domain Forwarder.
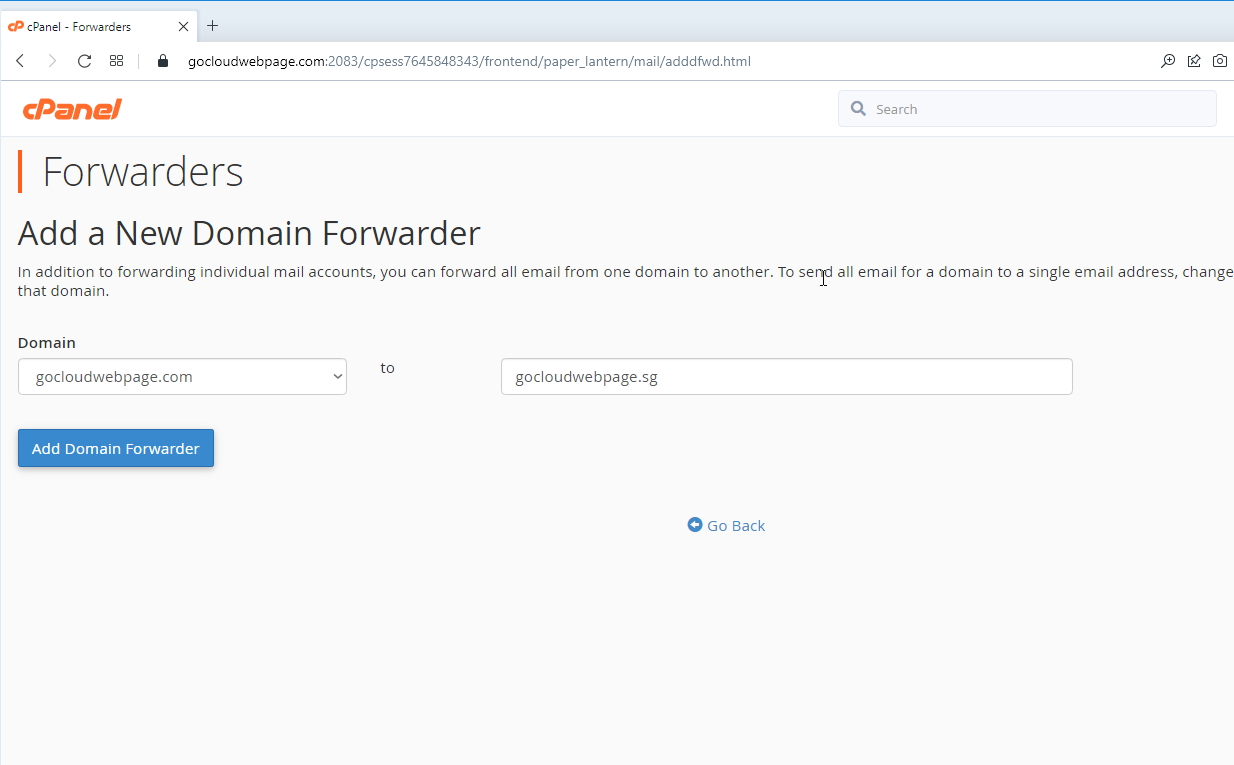
Select the Domain you want forwarded from the dropdown, then fill in where you want the messages to be forwarded to. Here’s an example:
When you’re done, you can click Add Domain Forwarder to save your changes.