WHAT IS POP?
Setting up a POP (Post Office Protocol) email account is similar to how you would regularly link a webmail account to your application, only with just a few added steps. POP allows you to access your emails, and gives you the option to download them onto a single device. However, once downloaded, it is deleted from the server and is inaccessible from other devices.
IMAP, on the other hand, allows you to access your email whether you are on your mobile, or your computer. If you want to set up an IMAP email account on your Apple Mail instead, go here. If you have not created an email account yet, click here to get started.
HOW TO SETUP POP EMAIL IN MAC OS?
- Open your Mail application from your desktop (Dock).

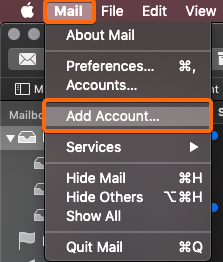
- From the menu bar at the top of the screen, click on Mail, then Add Account.
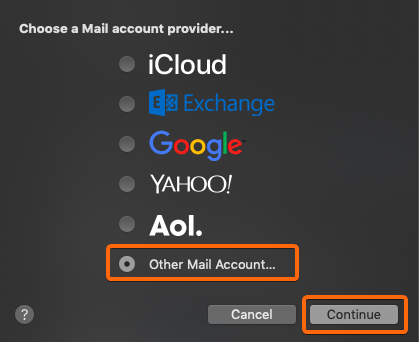
- Another screen will show, asking you to select which account you want to add. Click on Other Mail Account.
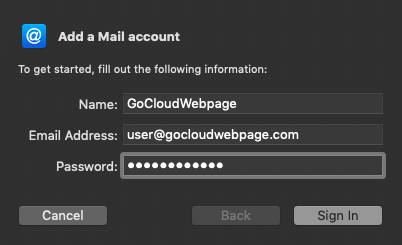
- You will be prompted to enter your Name (for your mailbox), your Email Address, and your Password.
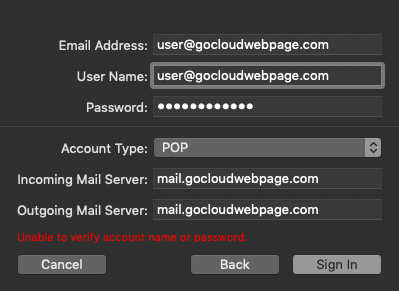
- For servers / domains that cannot automatically be identified by Mac OS, you will get another prompt to enter more information such as the Account Type, and the Incoming and Outgoing Mail Server.
For your CLDY webmail, the mail client settings are as follows:
Username: (your CLDY email)
Password: (your CLDY email password)
Incoming Server: mail.gocloudwebpage.com (Please replace the gocloudwebpage.com with your domain name)
Outgoing Server: mail.gocloudwebpage.com (Please replace the gocloudwebpage.com with your domain name)
* replace gocloudwebpage.com with your domain
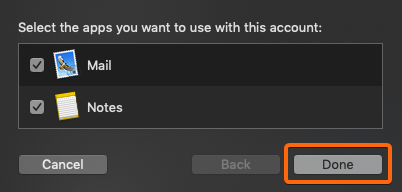
Once done, click on Sign In. - Your Apple Mail may still prompt you to share Mail and Notes, you can tick or untick the Notes sharing option as you prefer.
Click on Done, and your email should already be in sync to your CLDY webmail account.
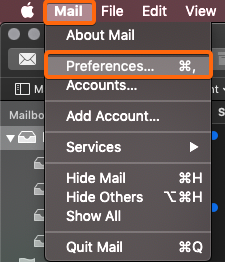
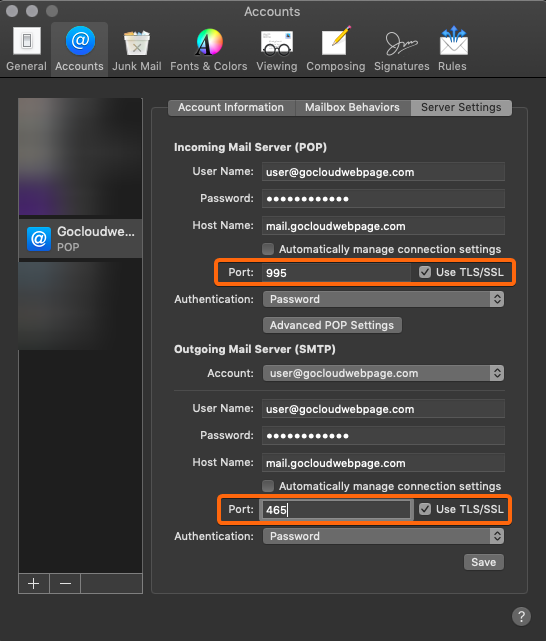
For a more advanced setup, you can specify your port configuration by going to the menu bar and clicking on Mail, then Preferences.
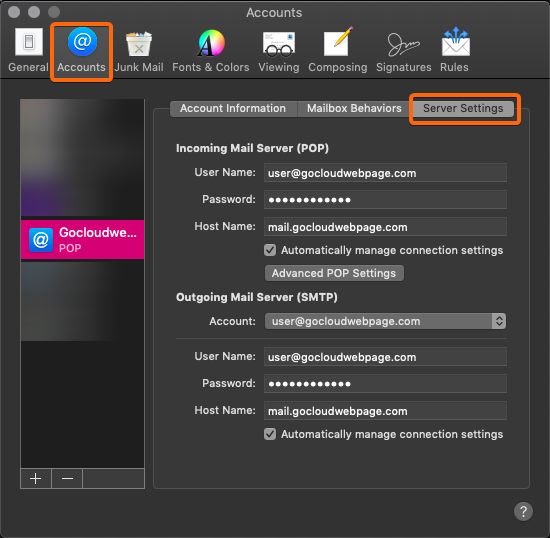
Once this screen pops up, go to Accounts, and select Server Settings. Make sure you have your POP email selected, as well.
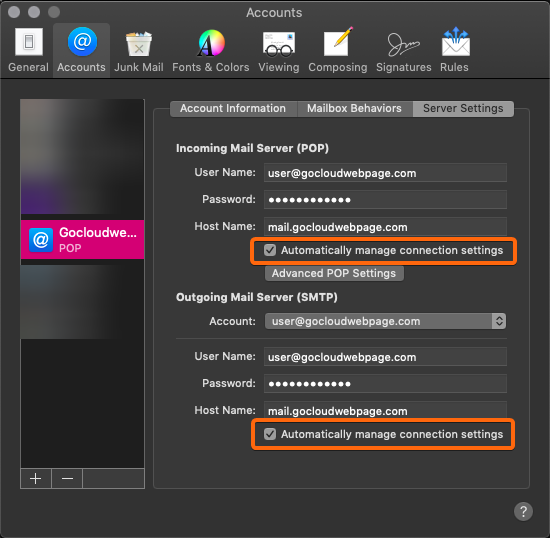
From here, click on both checkboxes beside Automatically manage connection settings (for both Incoming Mail Server (POP) and Outgoing Mail Server (SMTP).
Additional fields will populate as seen here:
Type in the port configuration settings as listed on your (cPanel webmail) Mail Client Manual Settings page. Use TLS/SSL must be ticked. You can now click on Save.
If you encounter any issues, contact us here and let us know.


