
Choosing a Template for each page is a major event. You need to keep some things in mind before and after you change a template and publish it so you won’t lose any data and website traffic.
In this tutorial, we’ll show you the process of how to properly choose a template for each page and how to publish it in the easiest manner possible following these step-by-step instructions. Let’s begin!
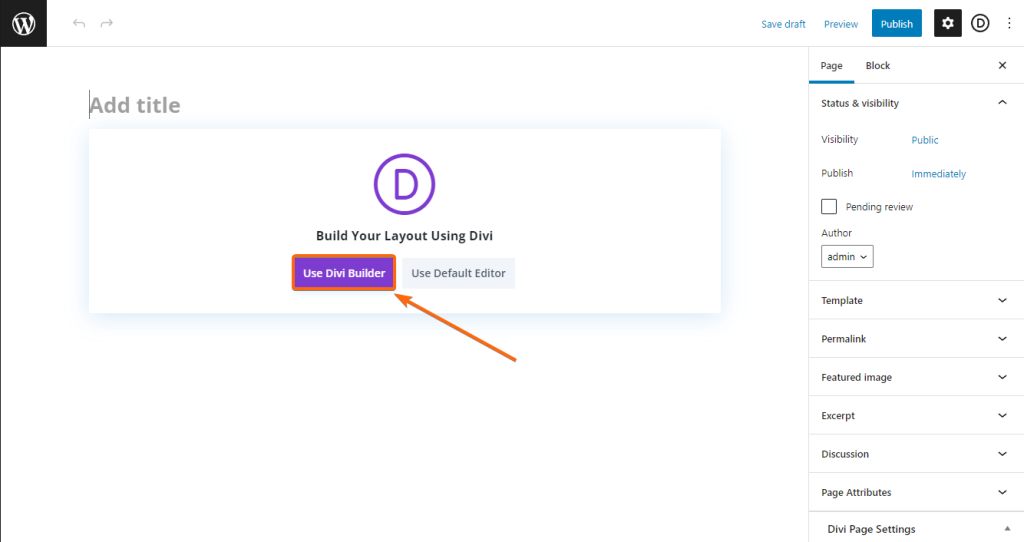
1. Login to your WordPress dashboard.
2. Go to Pages, and hit on Add New.

3. Click on Use Divi Builder, so you can select from the premade layouts right away.
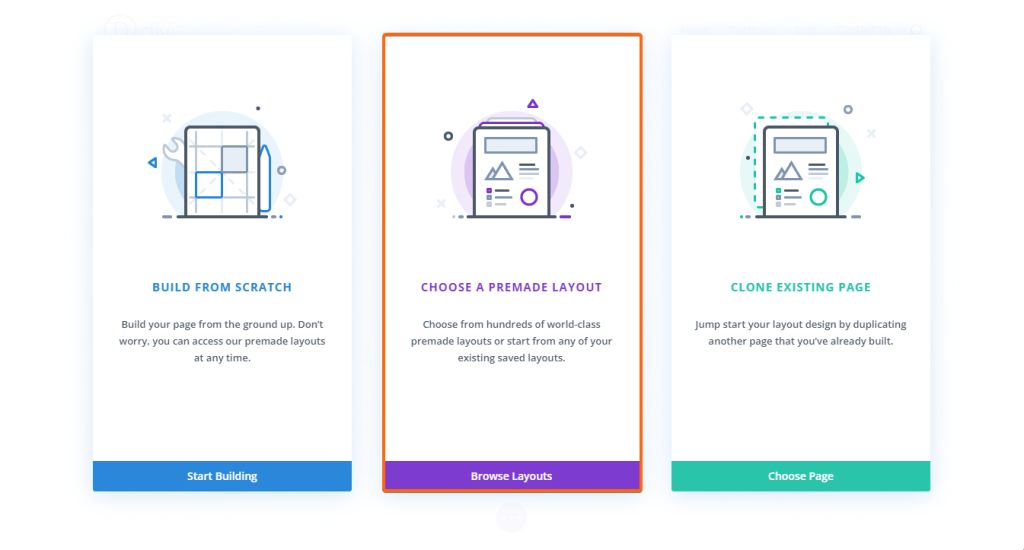
4. Select Choose A Premade Layout to proceed.
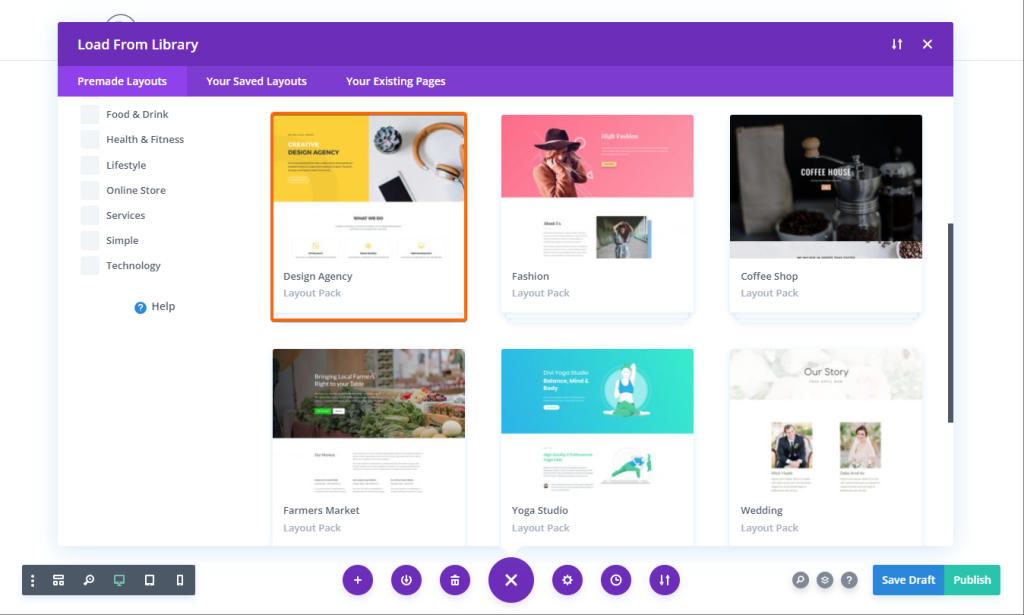
5. We’ll go ahead with Design Agency for this particular tutorial.
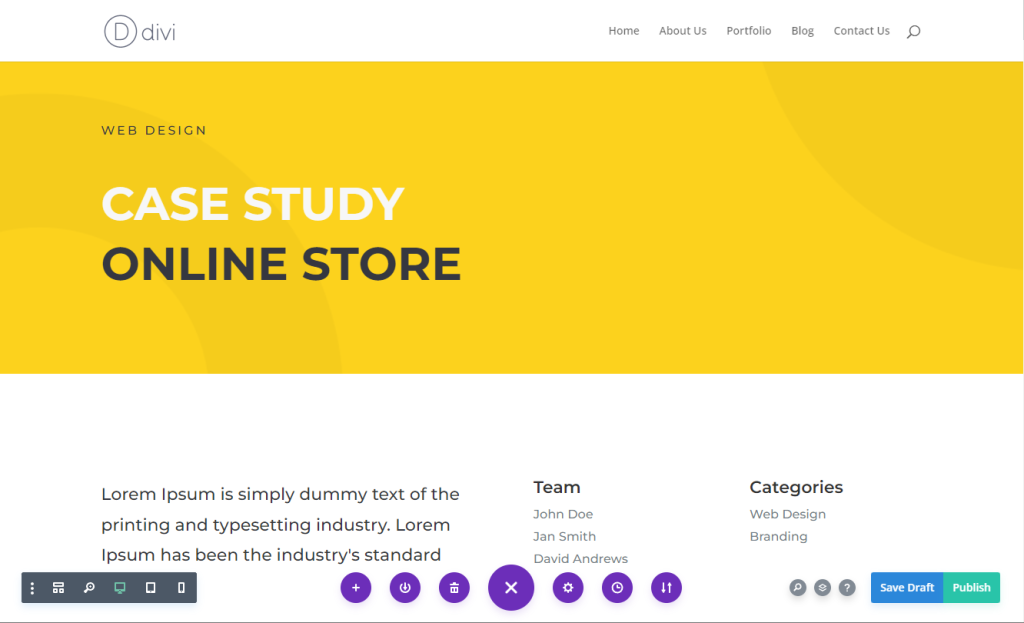
6. Select a page from the layout pack that you want to add to your website. For this example, we will choose Case Study. Then click on Use This Layout.
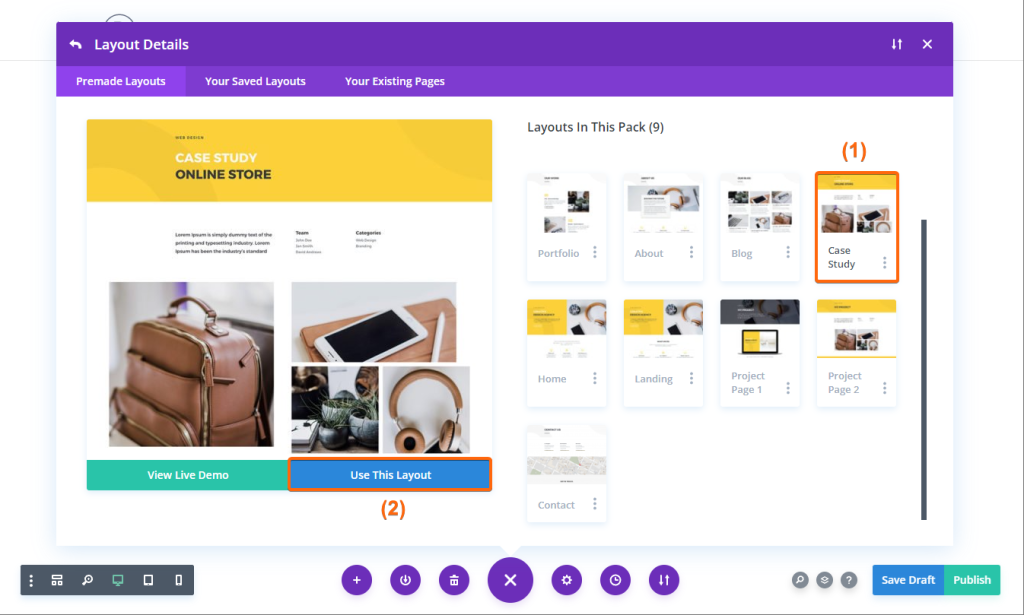
7. The Divi Builder will now load the Case Study template for you to continue designing your page.
8. Go ahead and edit as you go before you publish the page. Or, if you want it as a placeholder already and do the edits later, you can click on Publish immediately.

Now that you see that there’s nothing to it, we encourage you to try it out and choose a template for your page and publish it. You can always come back anytime if you need to review the steps.


